BMW 5 Series G60 Ambient Lighting Cover Installation Instructions

This installation tutorial will show you how to install our B&W design ambient light cover for BMW 5 G60, upgrade the original cover with ambient light function
If you are interested in this product too, can click the link for more details: B&W Design LED Ambient Light Cover for BMW 5 Series G60
1. Before installing the ambient cover

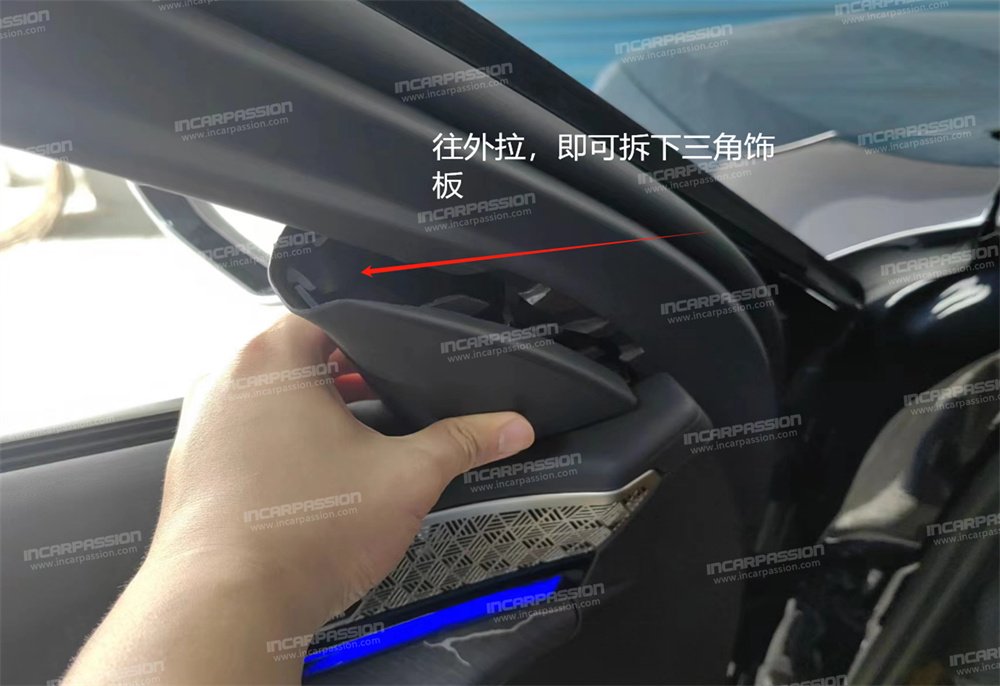
2. Use a pry – plate to pry open the triangular position of the original car 
3. Pull it outwards to remove the triangular trim panel
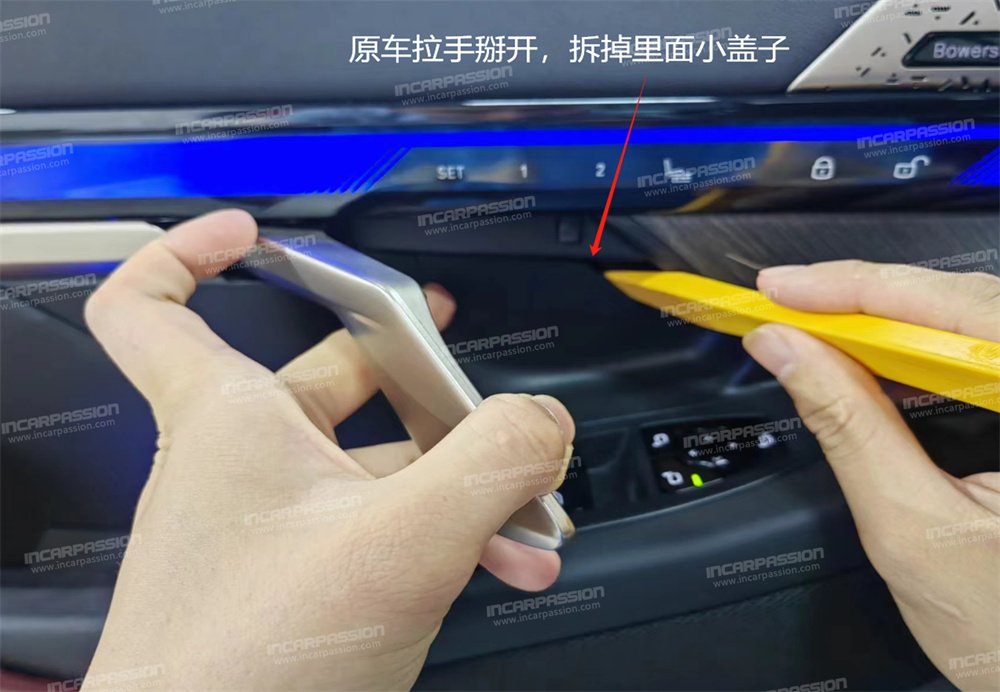
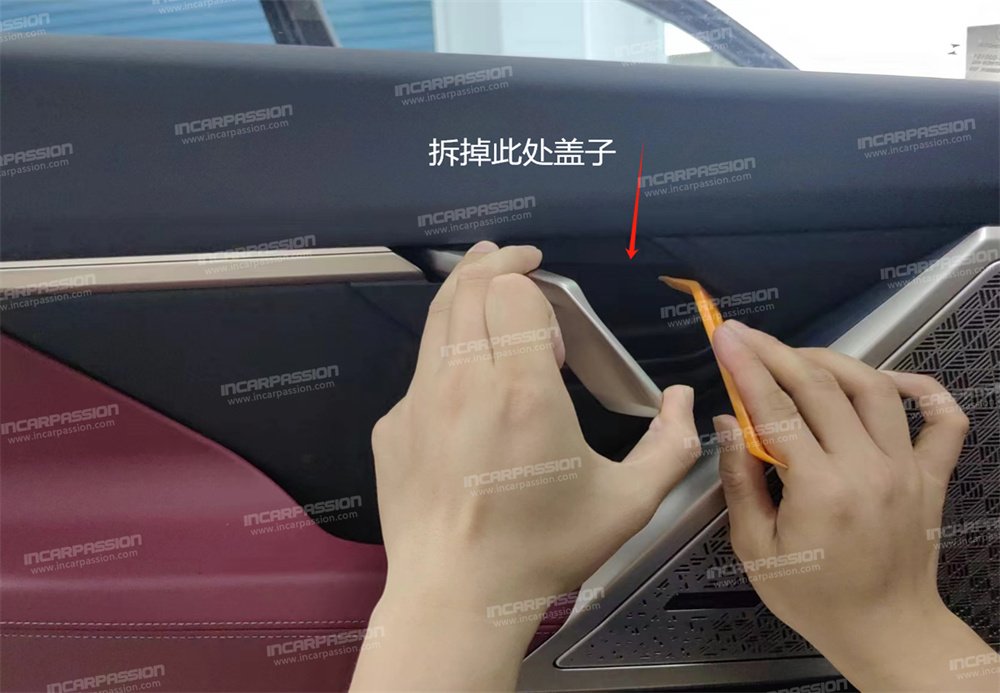
4. Open the original car door handle and remove the small cover inside
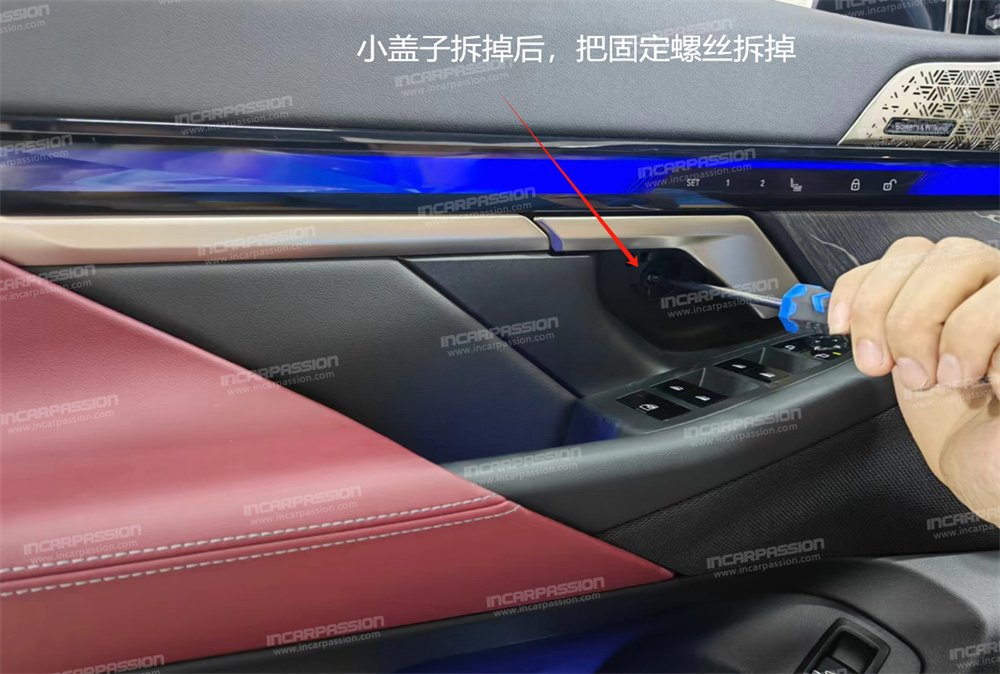
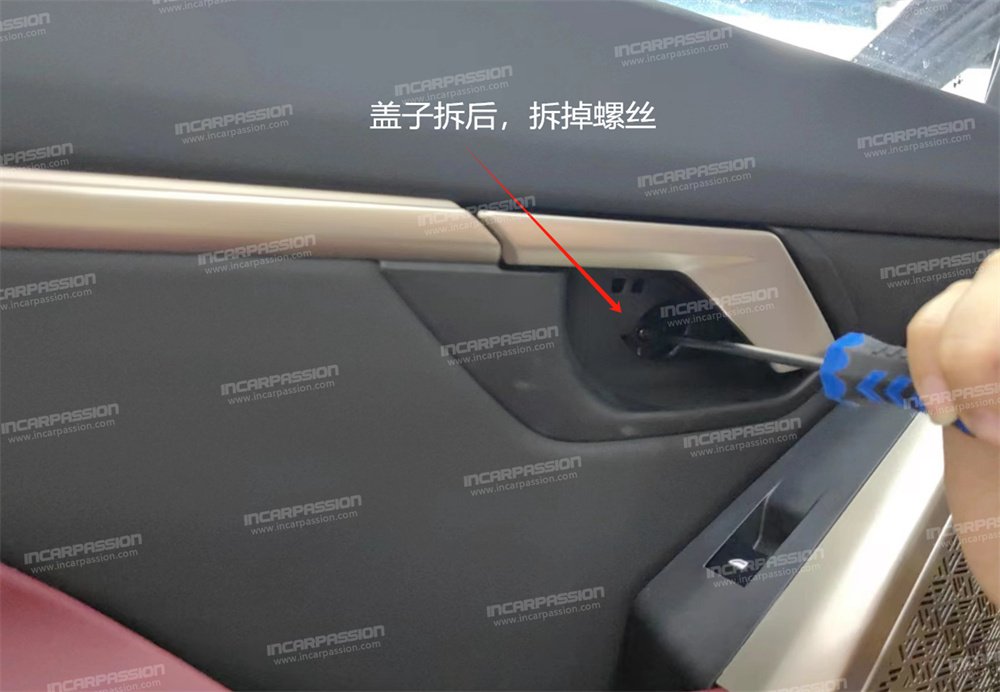
5. After removing the small cover, remove the fixing screw
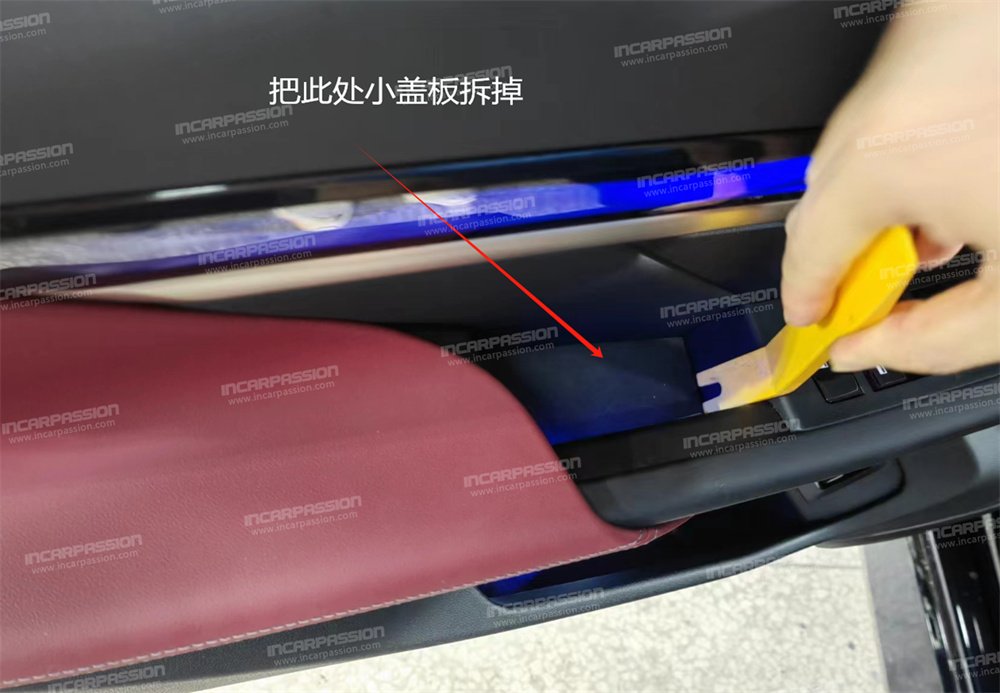
6. Remove the small cover plate here
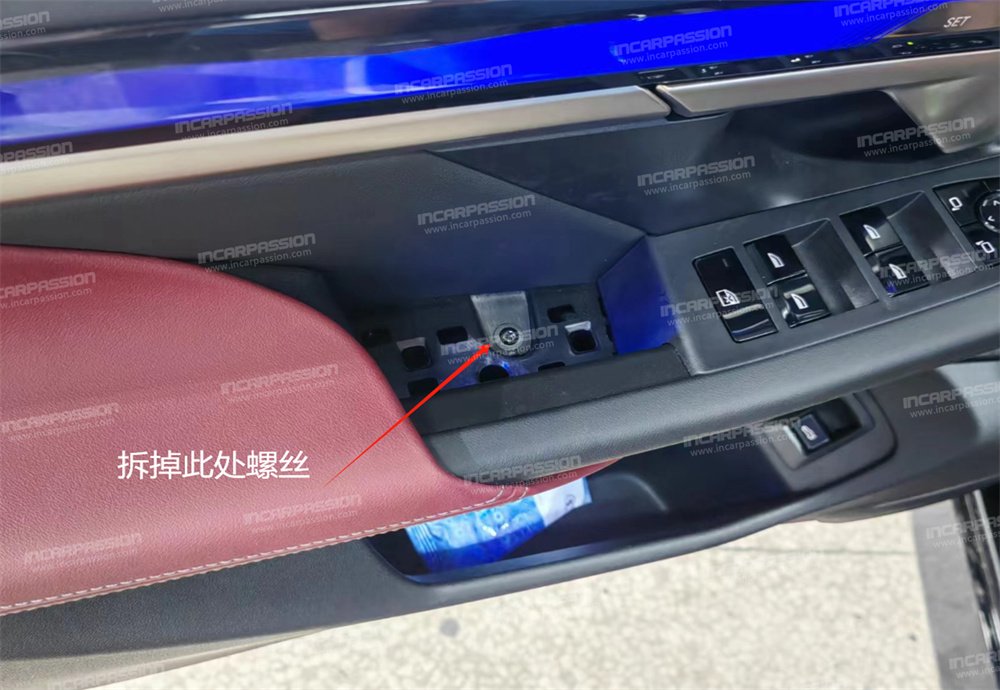
7. Remove the screw here
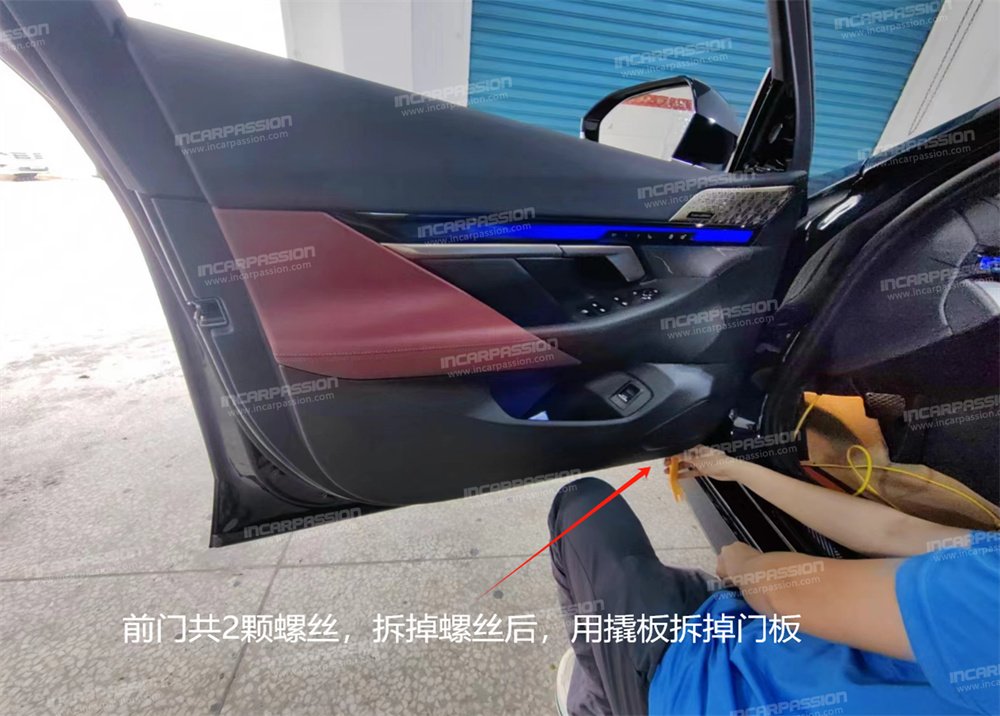
8. There are 2 screws in total on the front door. After removing the screws, use a pry – plate to remove the door panel
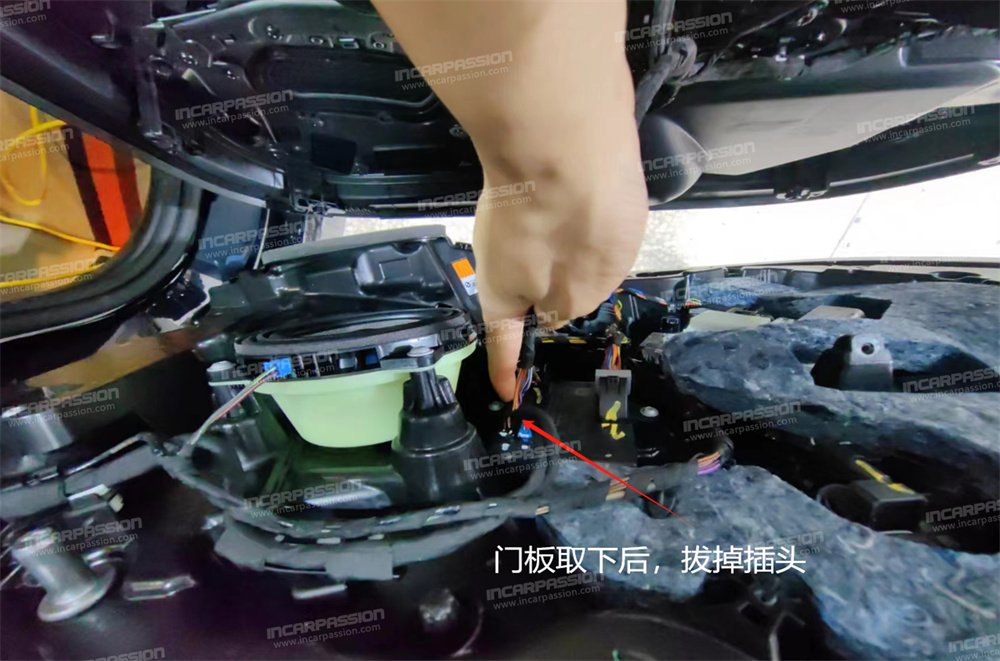
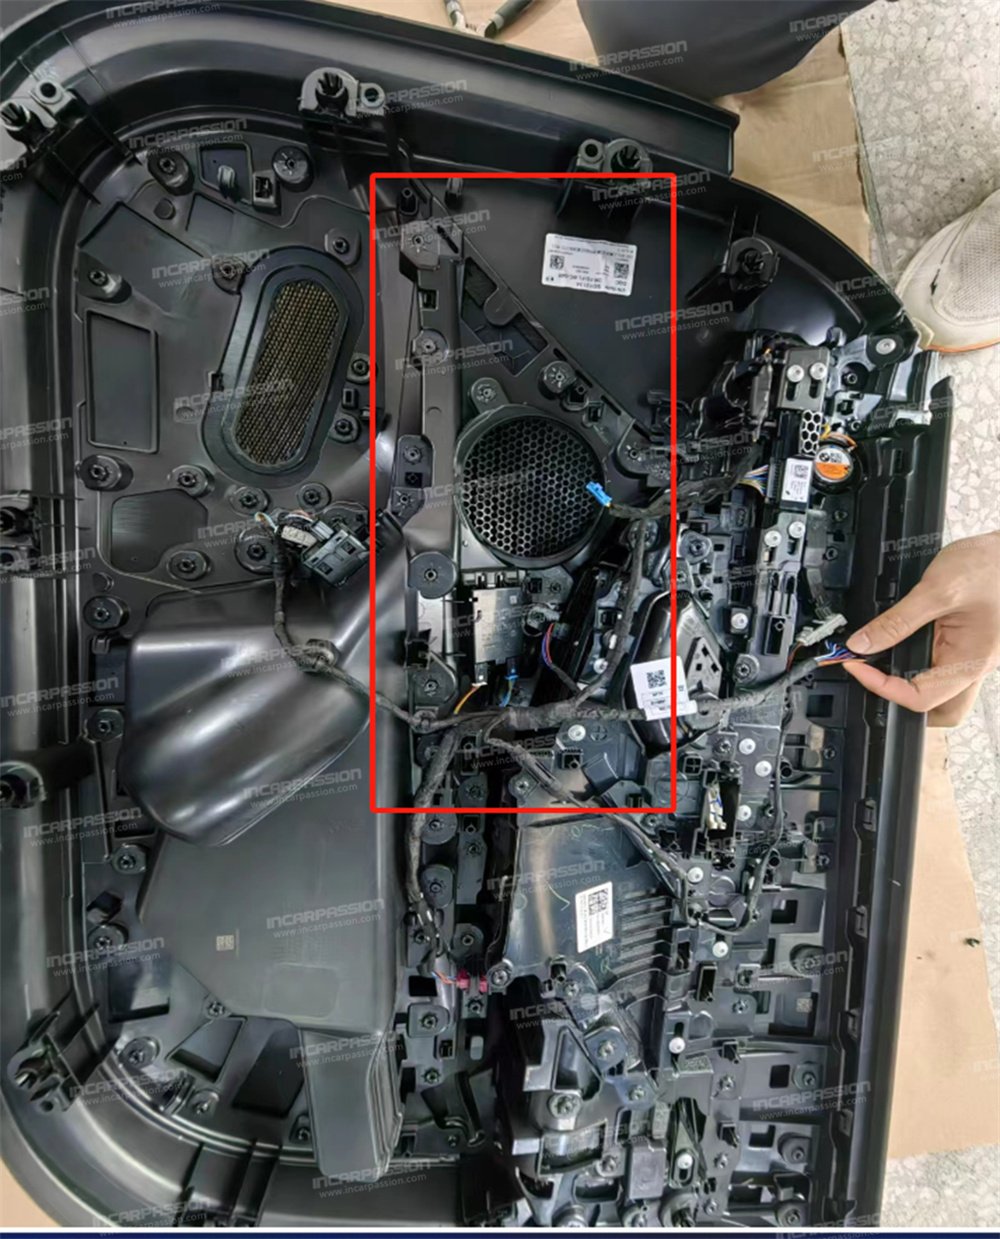
9. After removing the door panel, unplug the connector
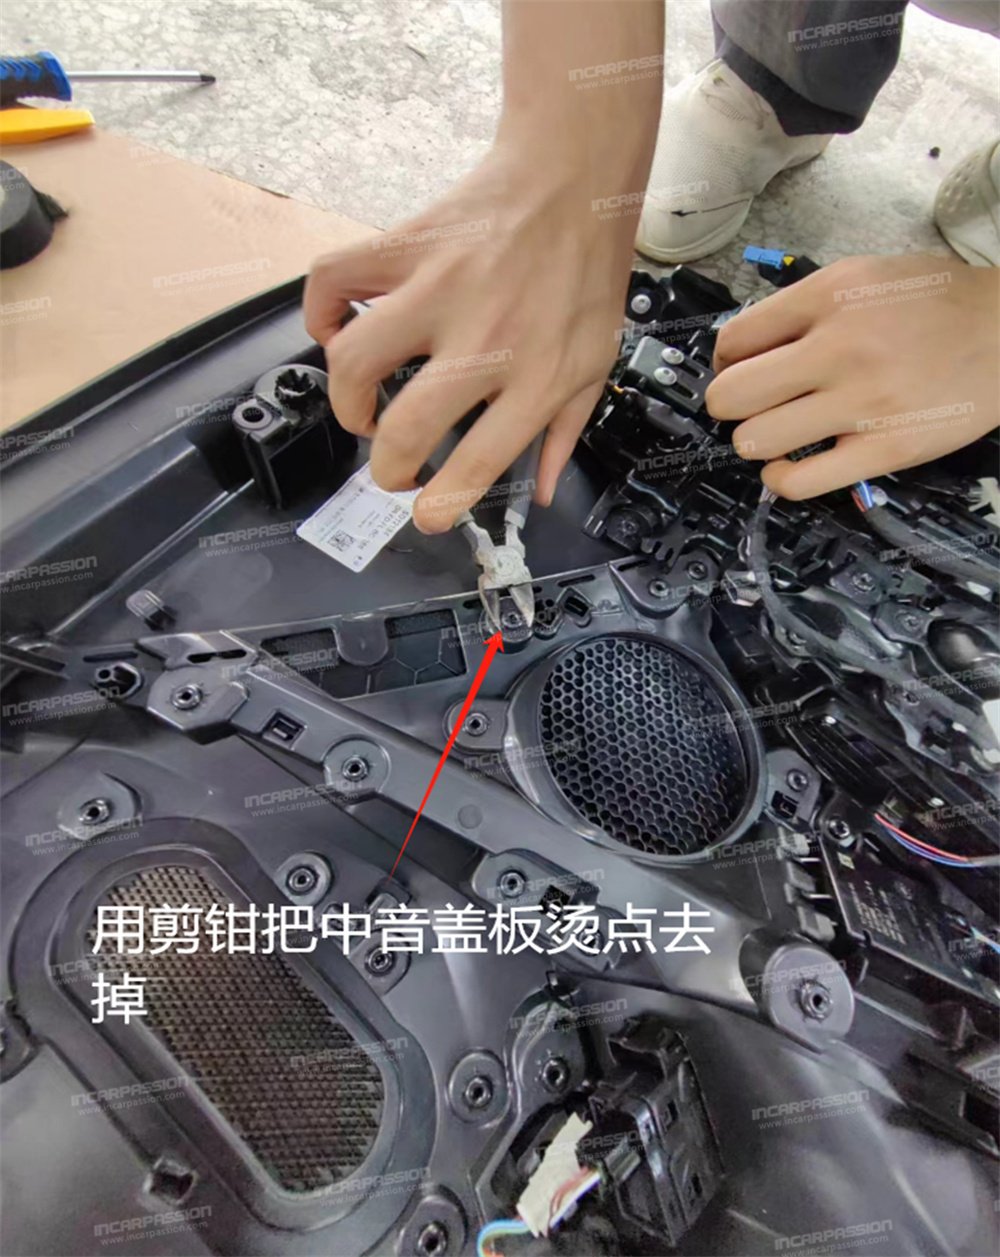
10. After removing the door panel, remove the heat – staked points of the original car’s mid – range speaker cover and take off the mid – range speaker cover.
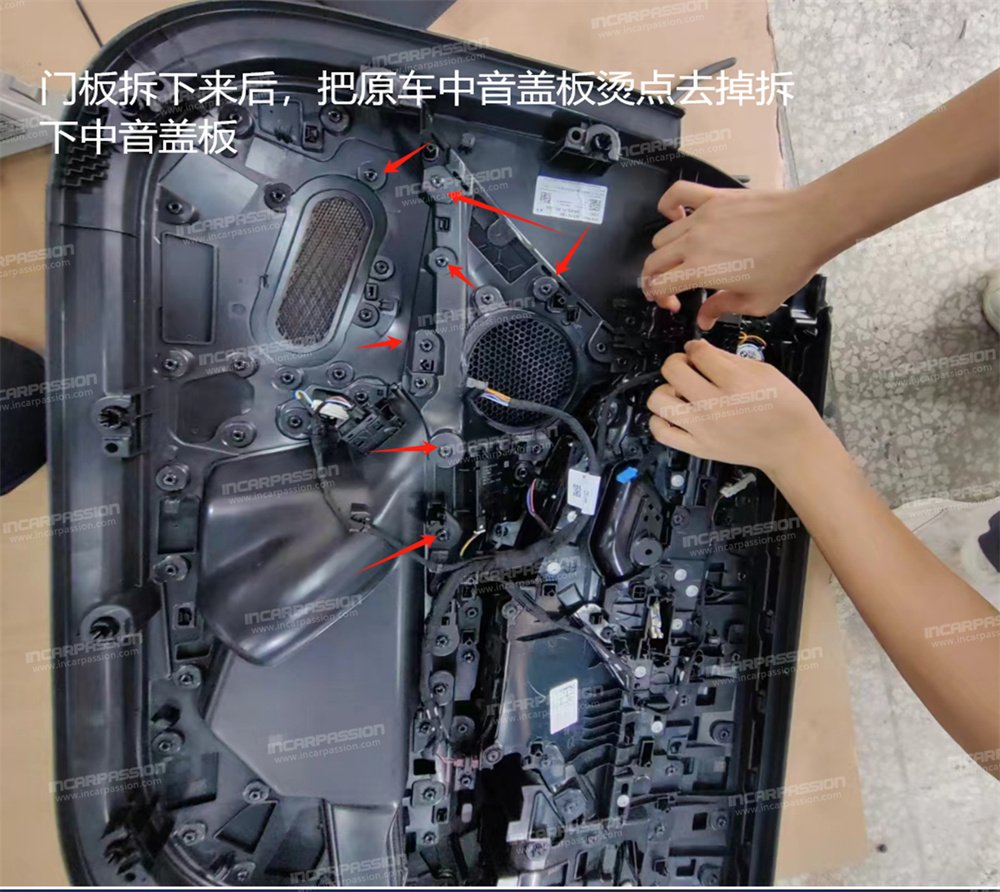
11. Use wire cutters to remove the heat – staked points of the mid – range speaker cover
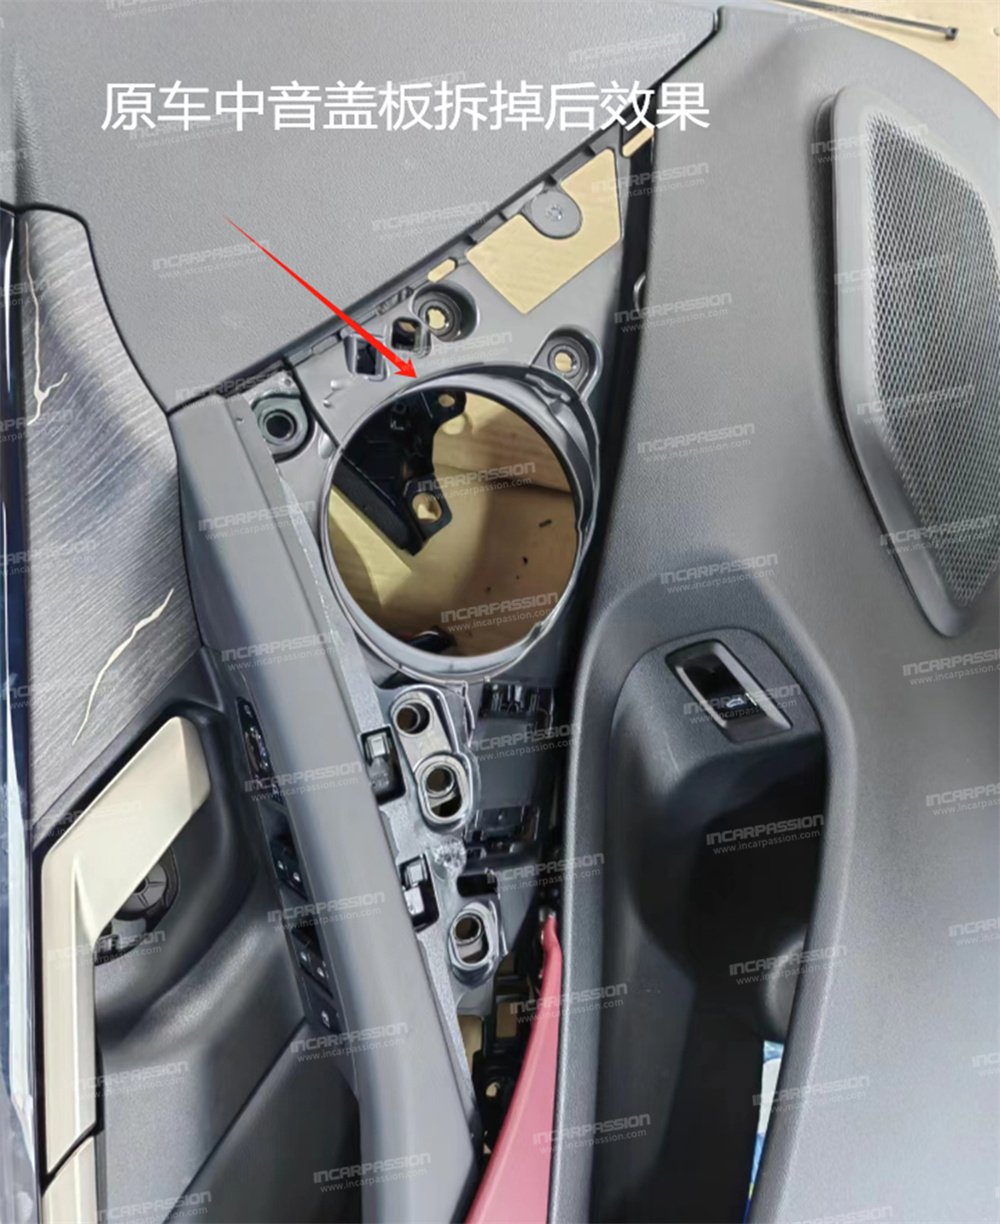
12. The effect after removing the original car’s mid – range speaker cover
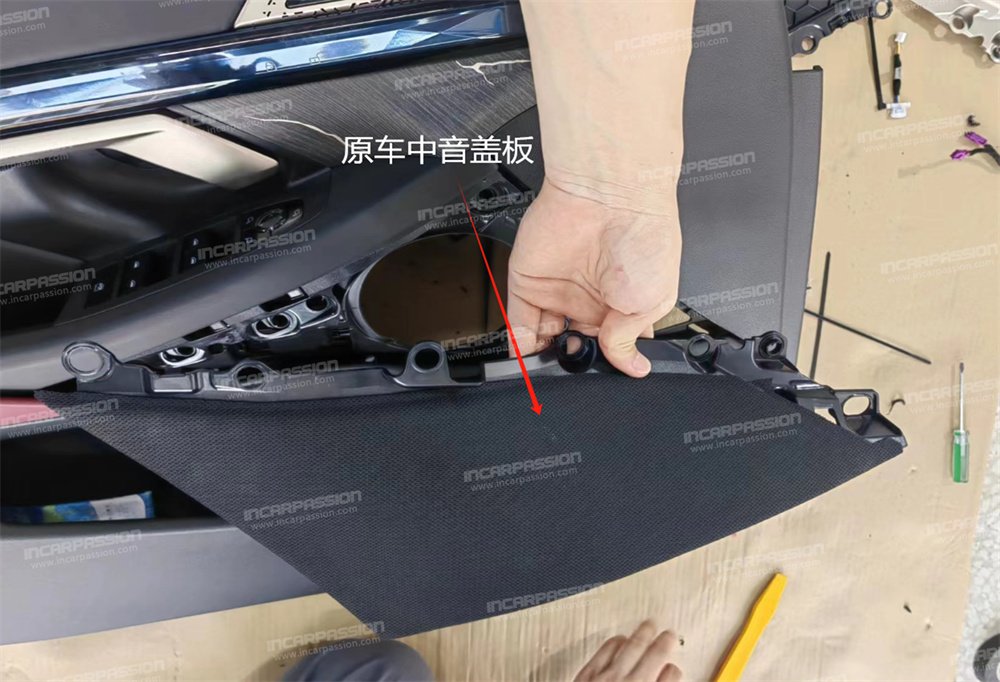
13. The original car’s mid – range speaker cover
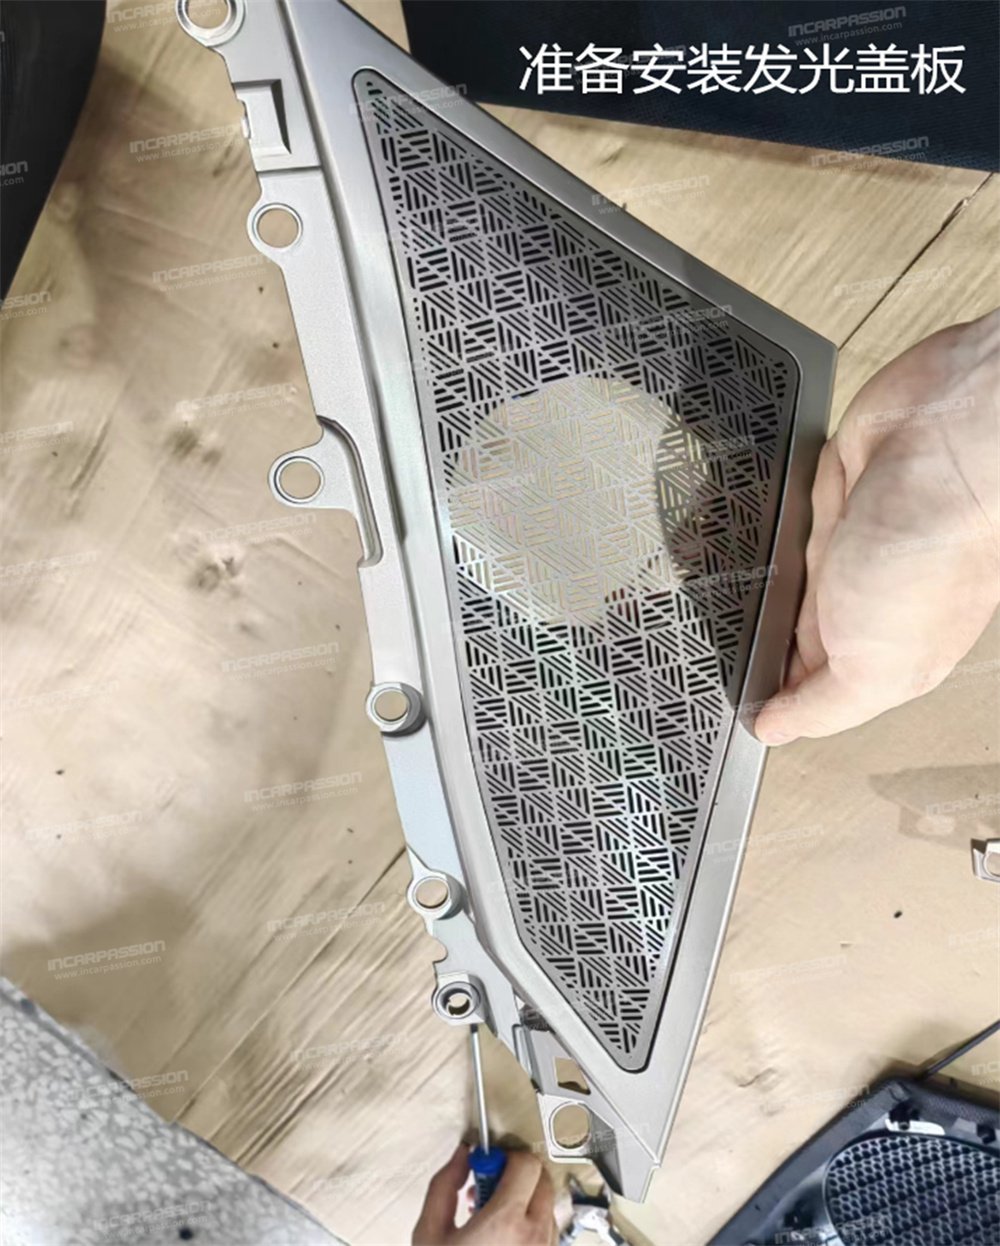
14. Prepare to install the luminous cover
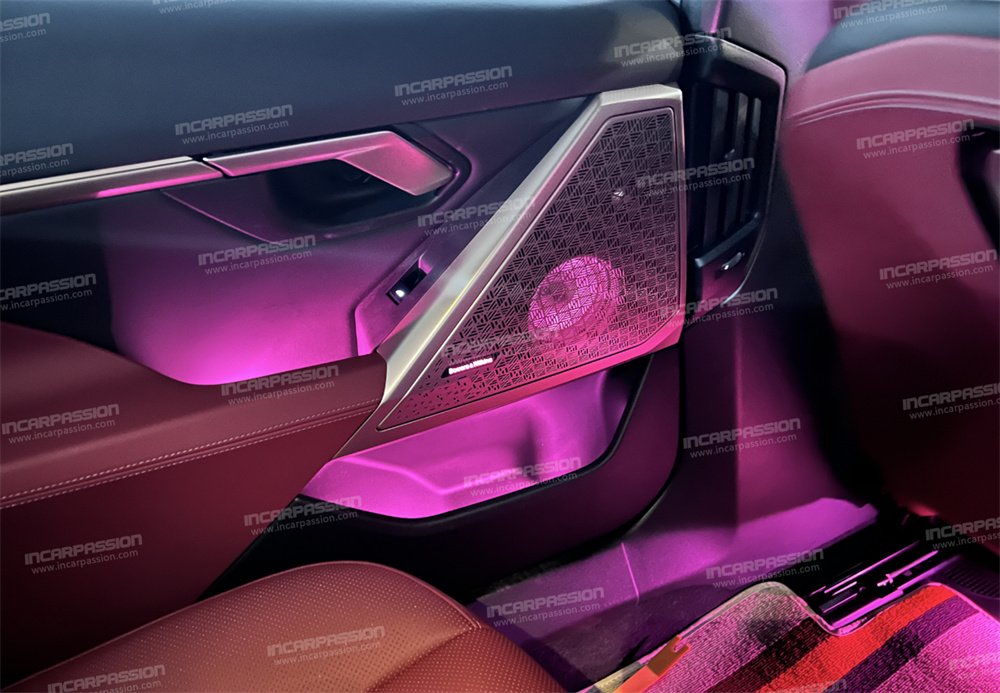
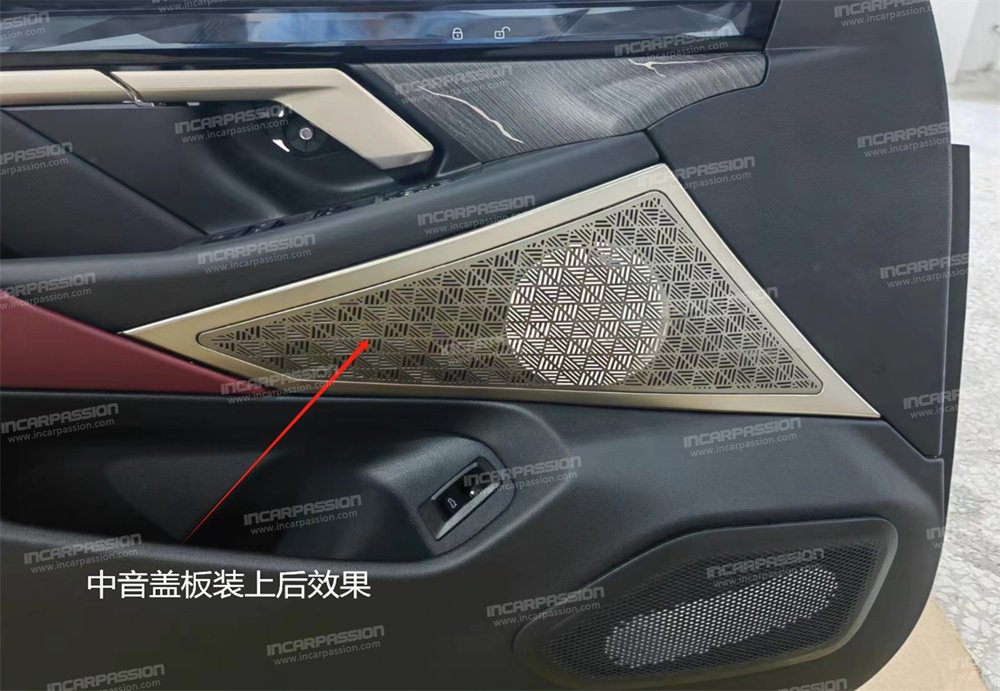
15. The effect after installing the mid – range speaker cover
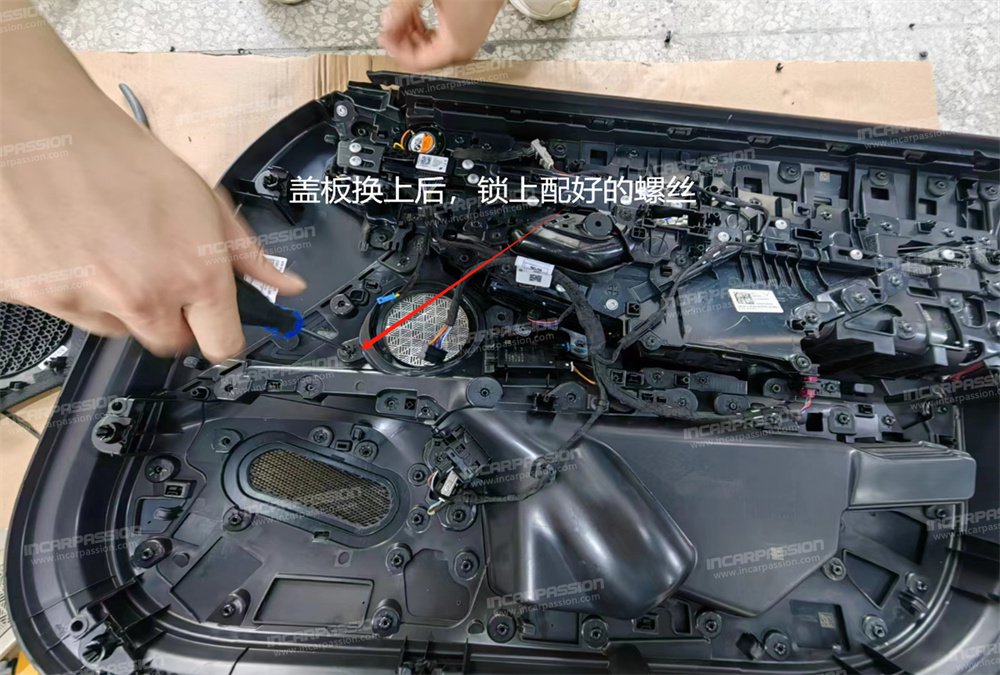
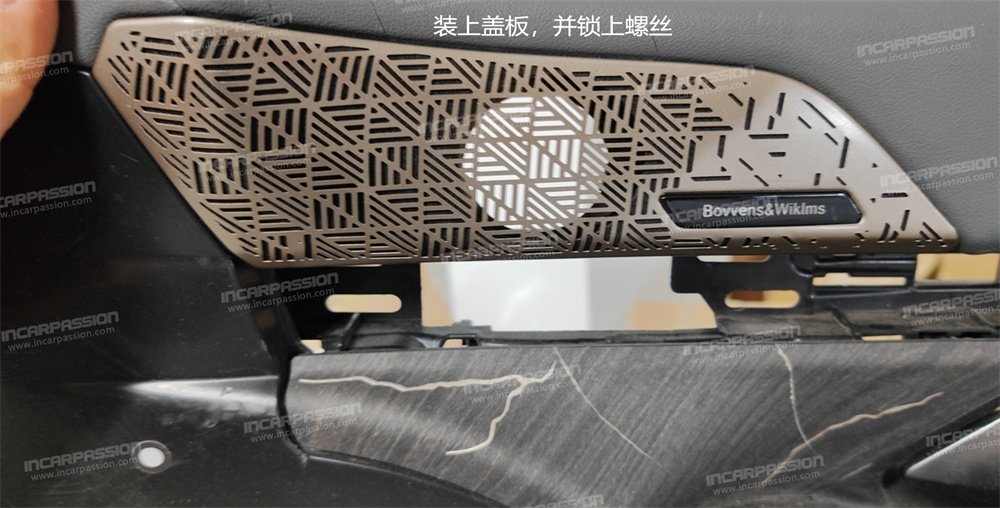
16. After replacing the cover, lock the provided screws
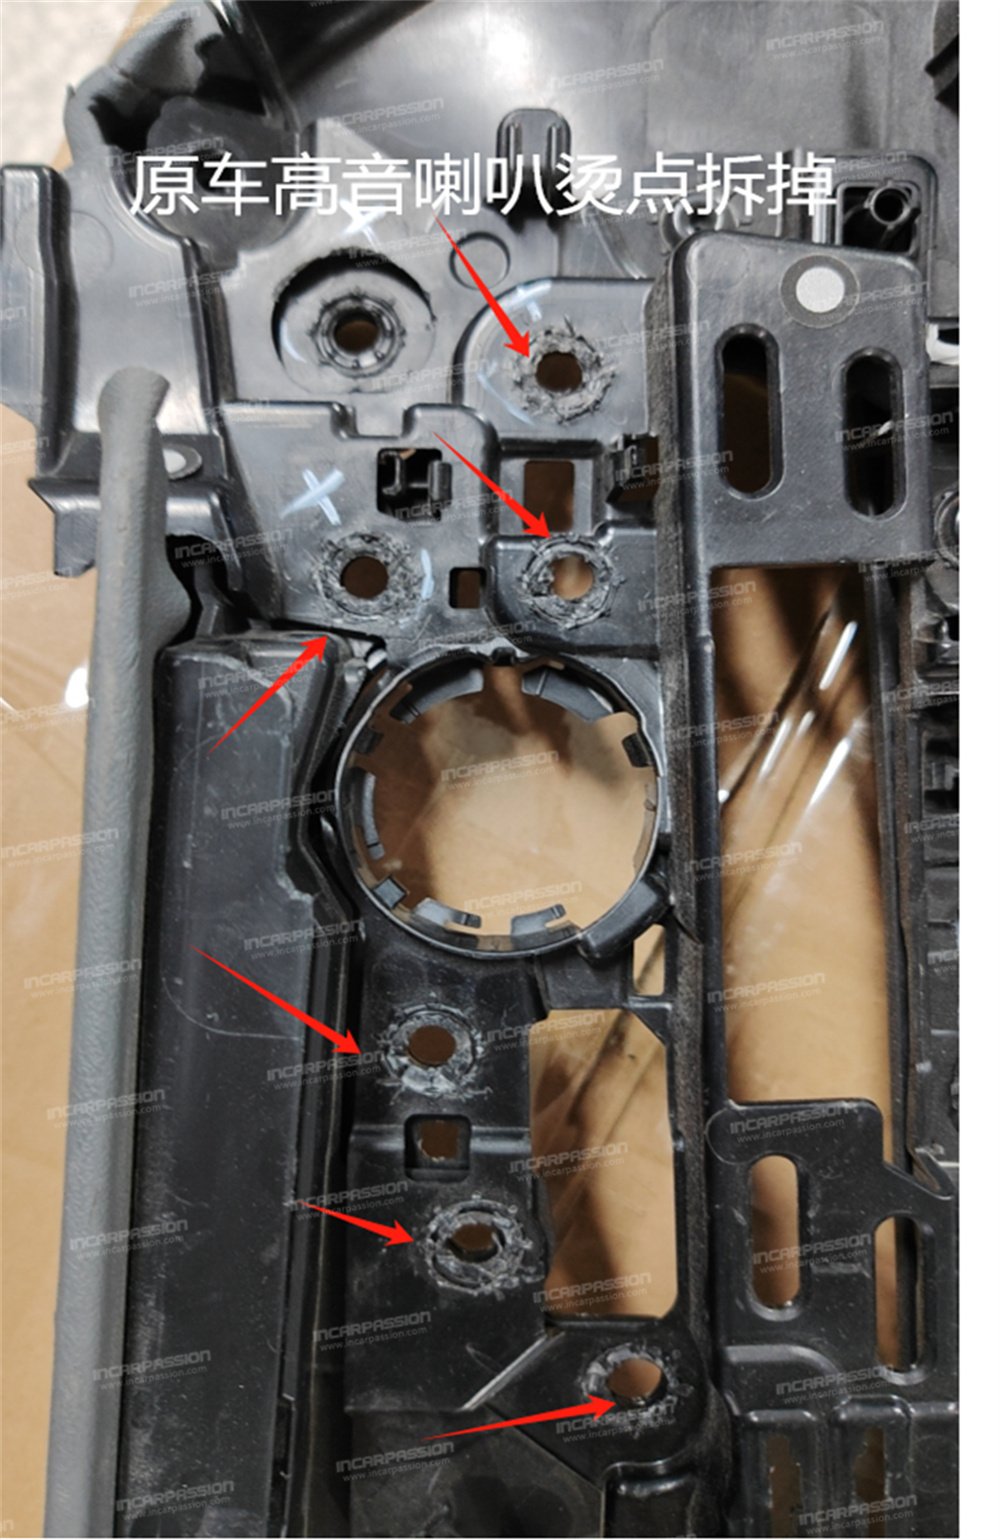
17. Remove the heat – staked points of the original car’s tweeter
18. Install the cover plate and lock the screws.
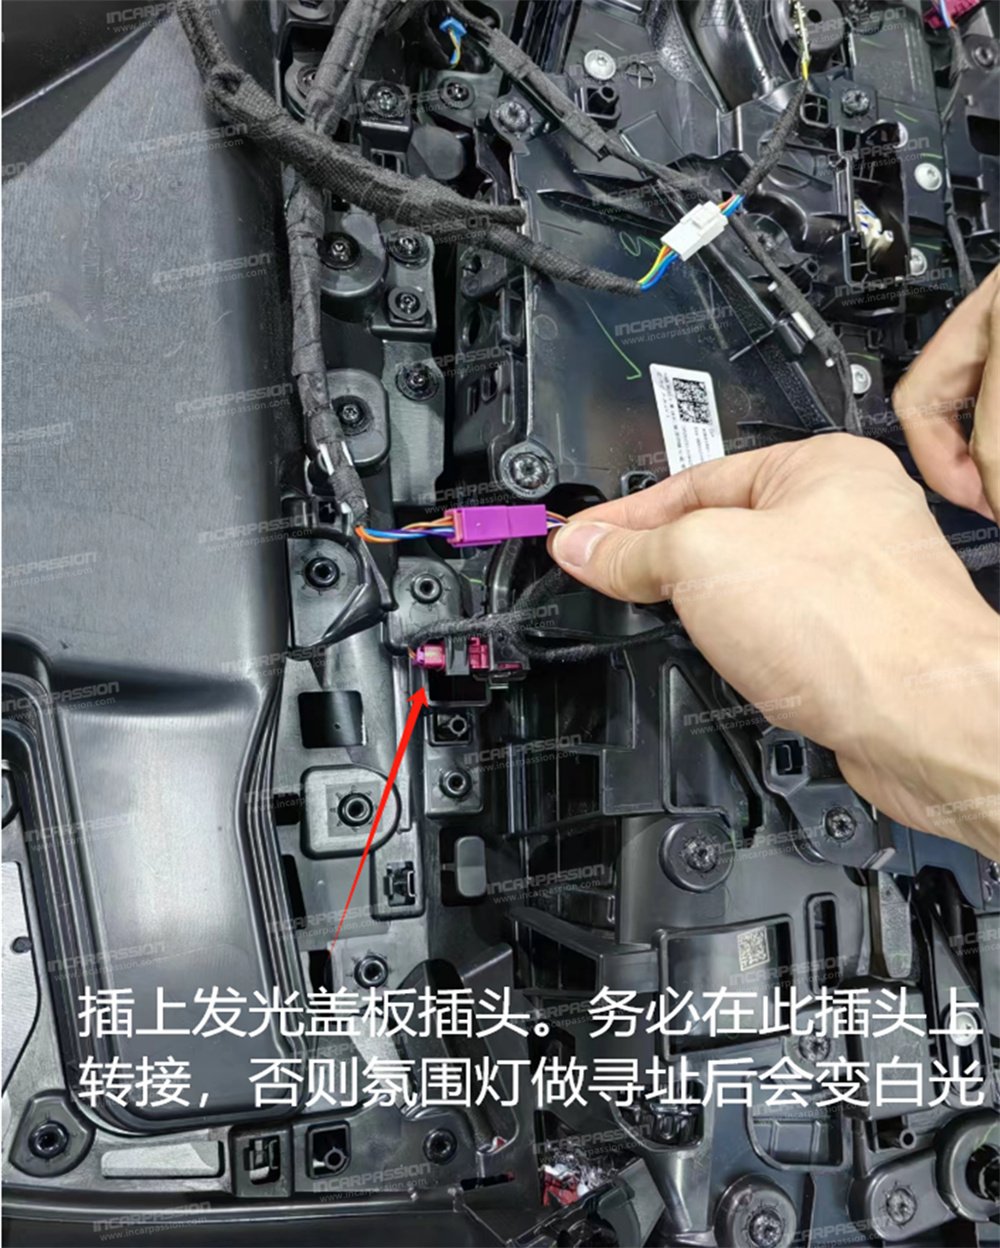
19. Plug in the connector of the luminous cover plate. Make sure to make a connection at this connector. Otherwise, the ambient light will turn white after addressing.
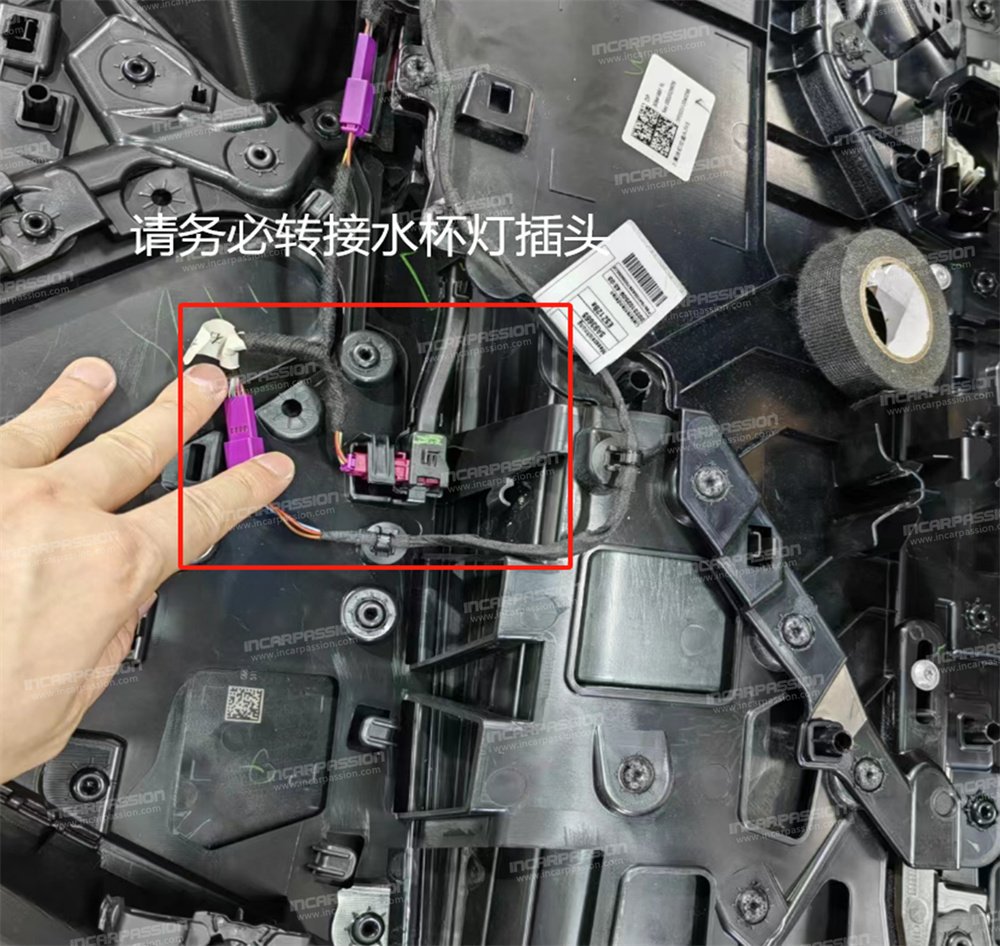
20. Please make sure to connect the cup – holder light connector.
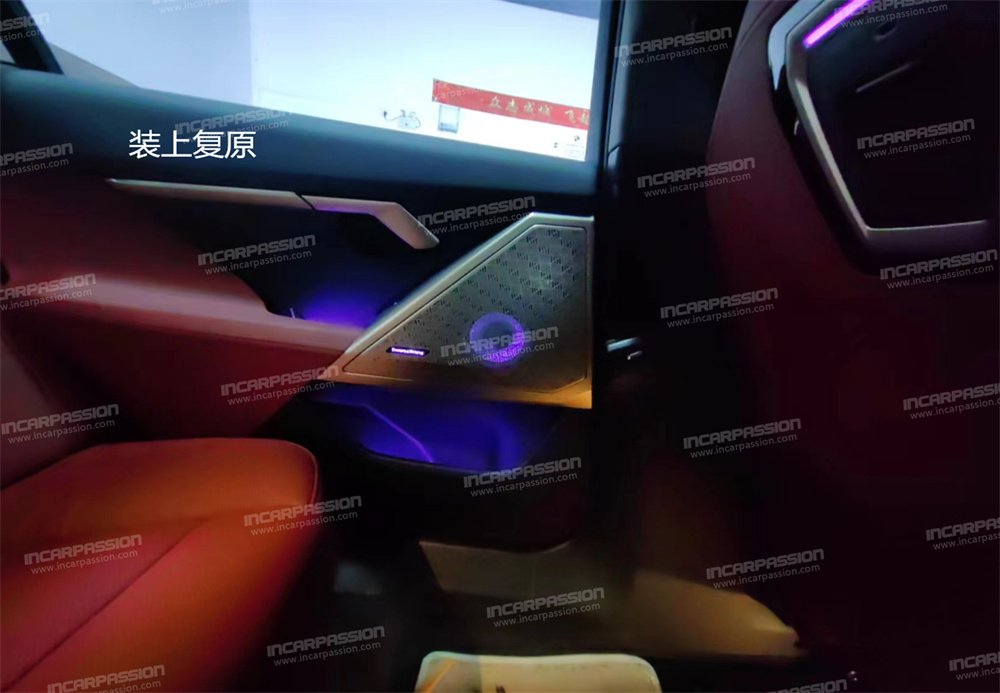
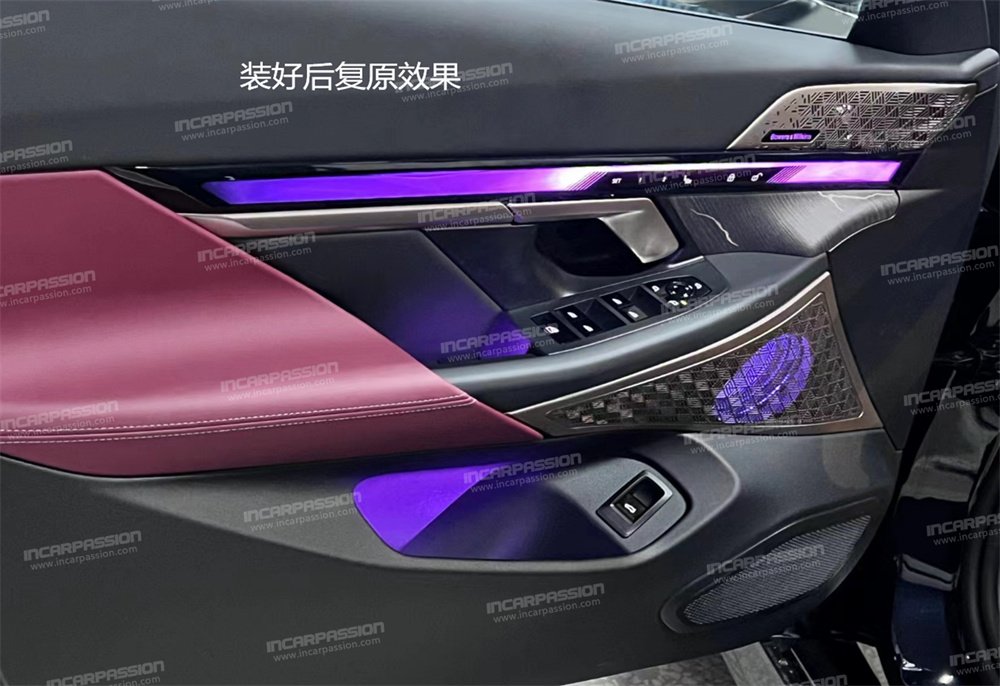
21. The restoration effect after installation.
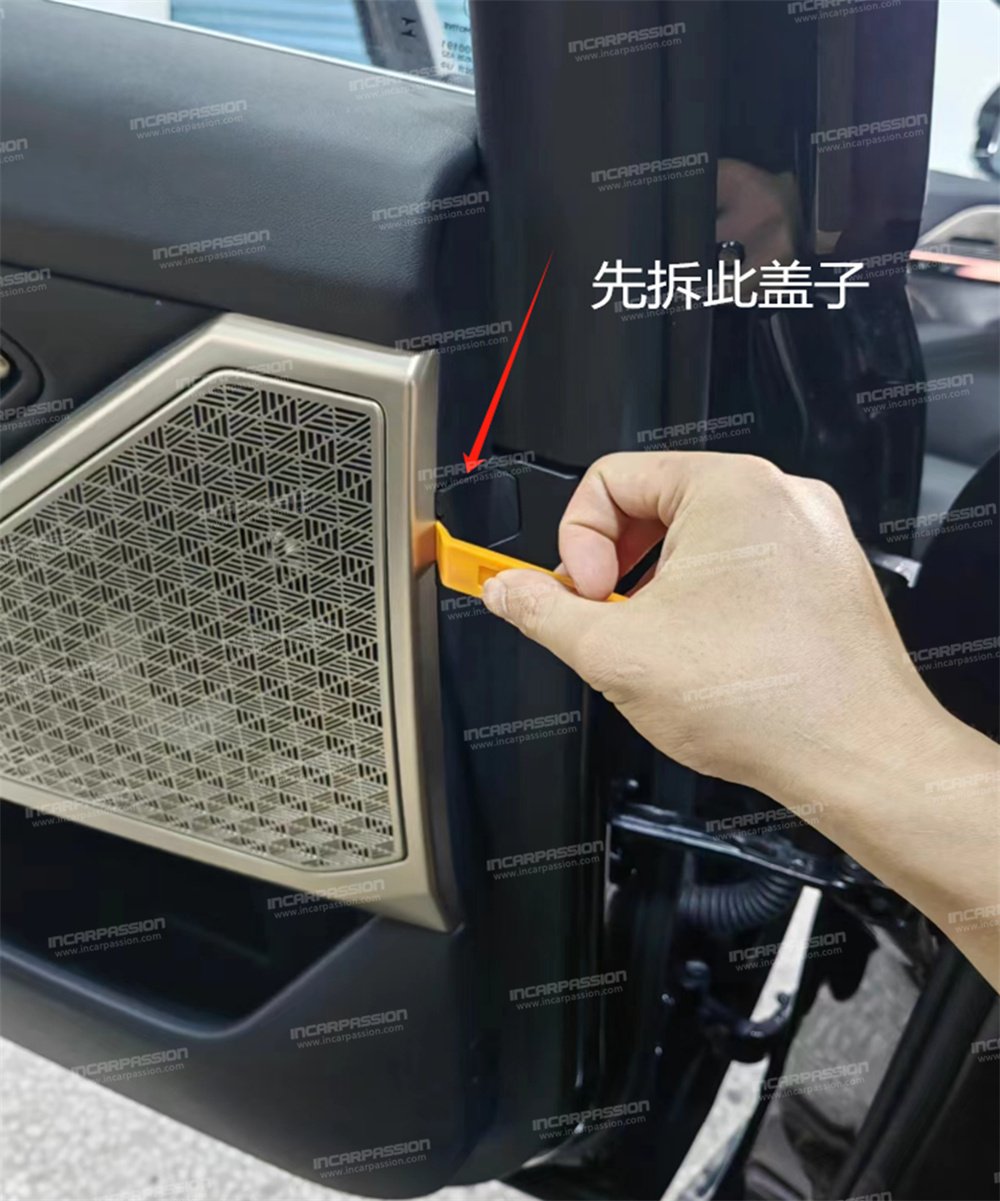
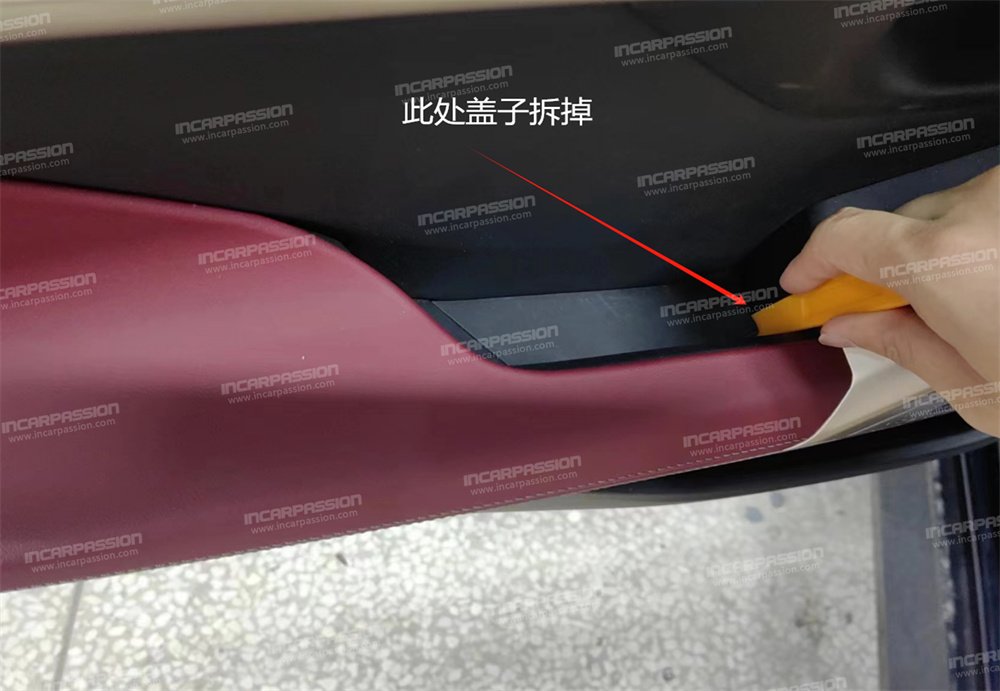
22. Remove this cover first.
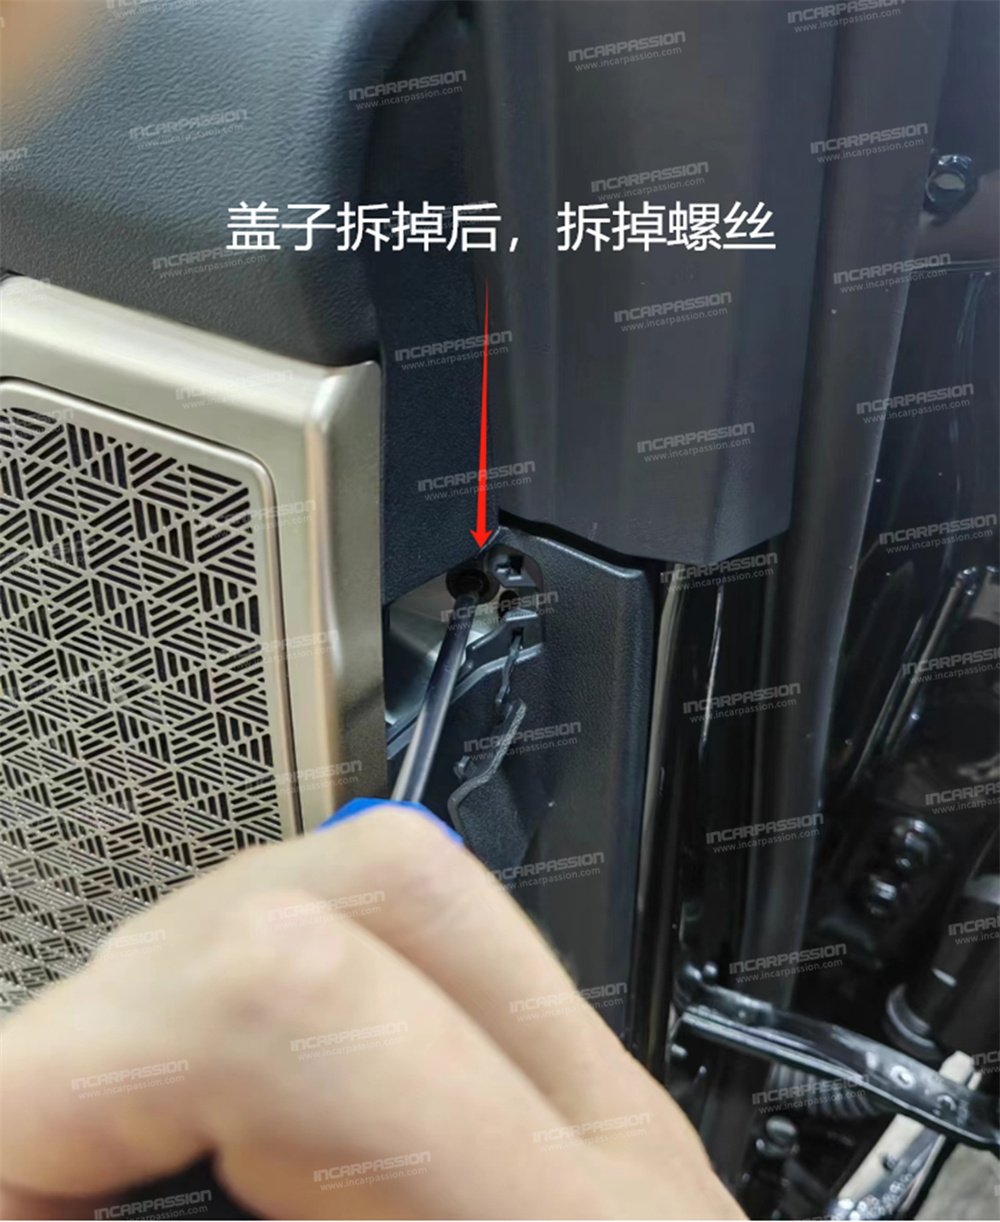
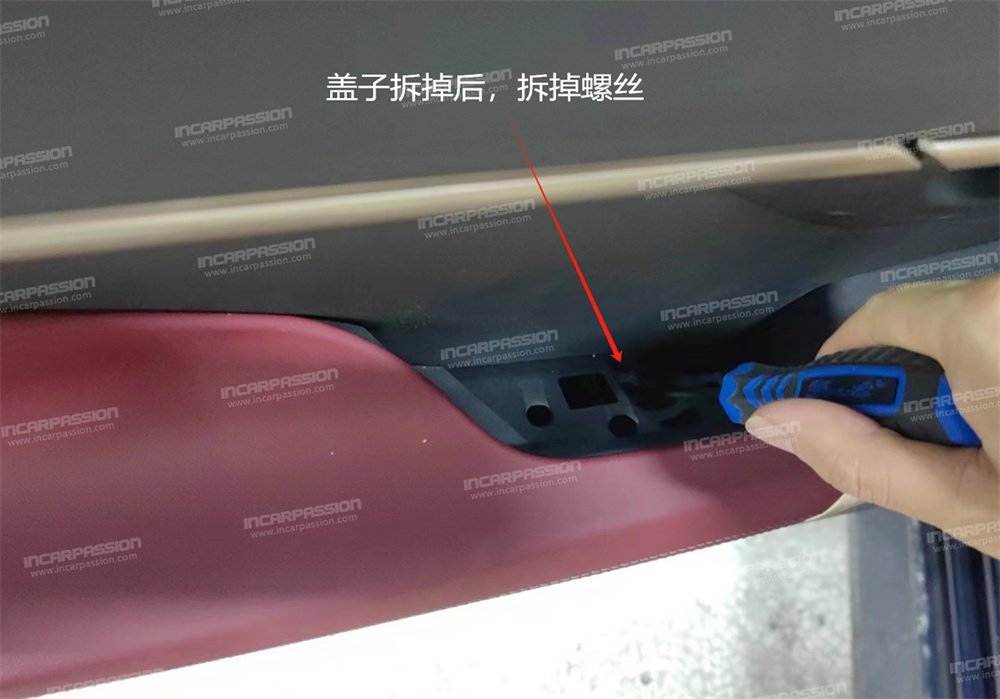
23. After removing the cover, remove the screws.
24. Remove the cover here.
25. After removing the cover, remove the screws.
26. Remove the cover here.
27. After removing the cover, remove the screws.
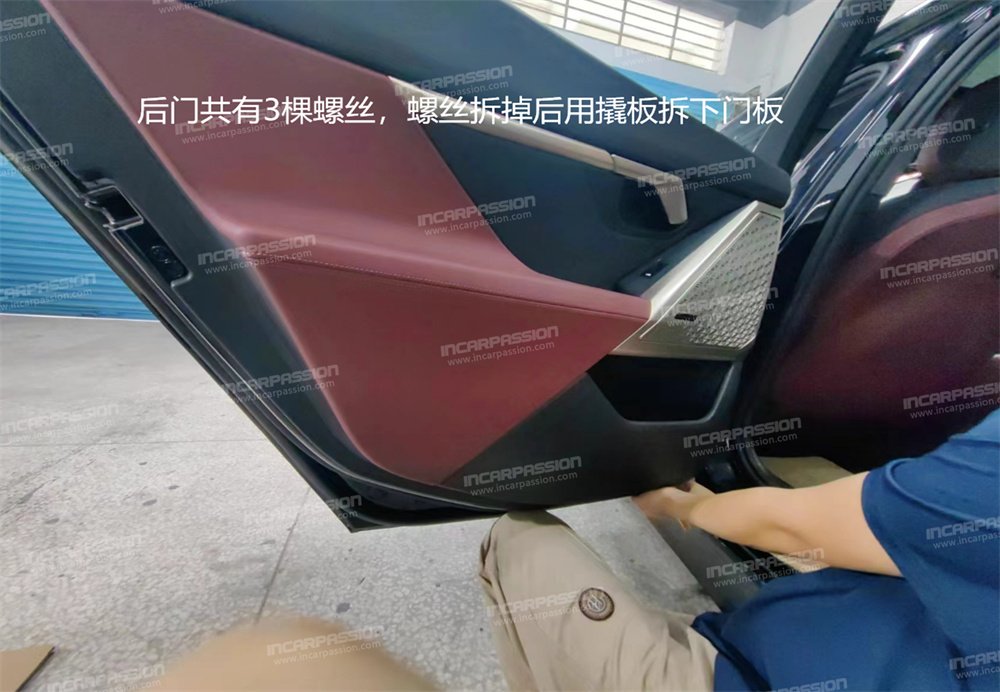
28. There are 3 screws in the rear – door. After removing the screws, use a pry – plate to remove the door panel.
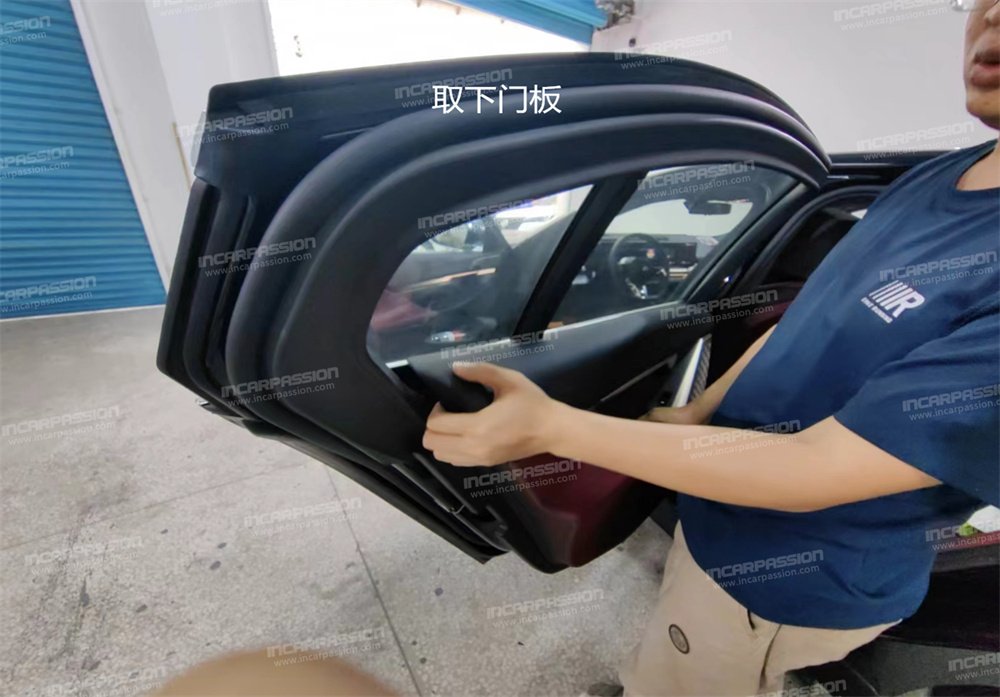
29. Remove the door panel.
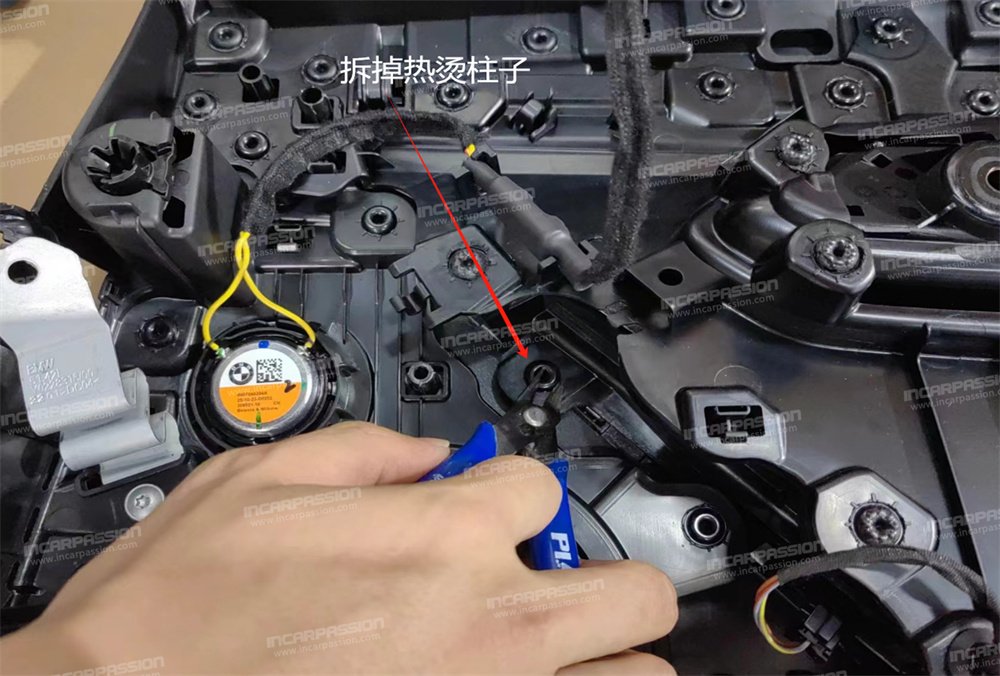
30. Use wire – cutters to remove the heat – staked posts, and then remove the mid – range speaker cover.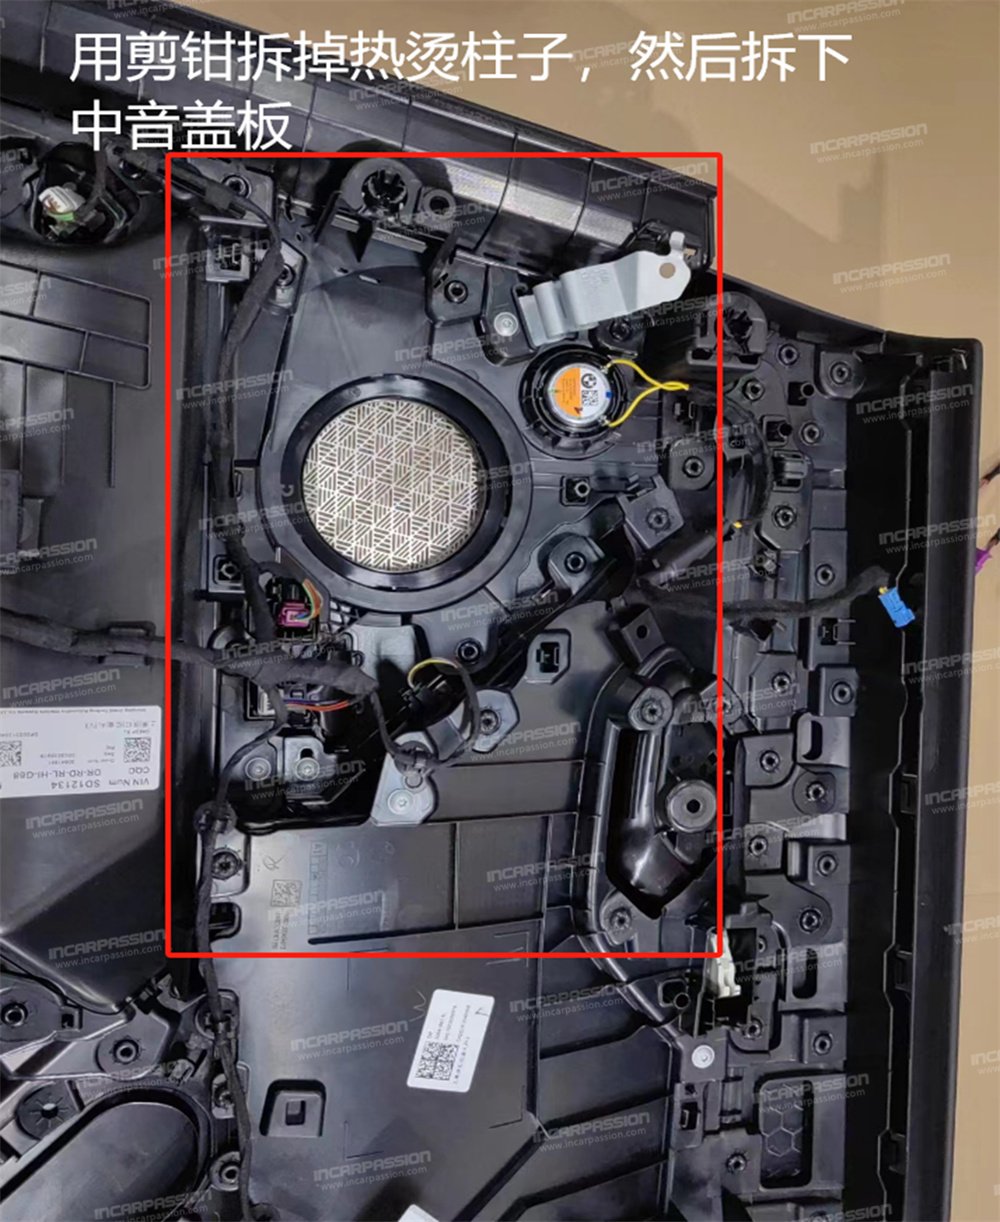
31. Remove the heat – staked posts.
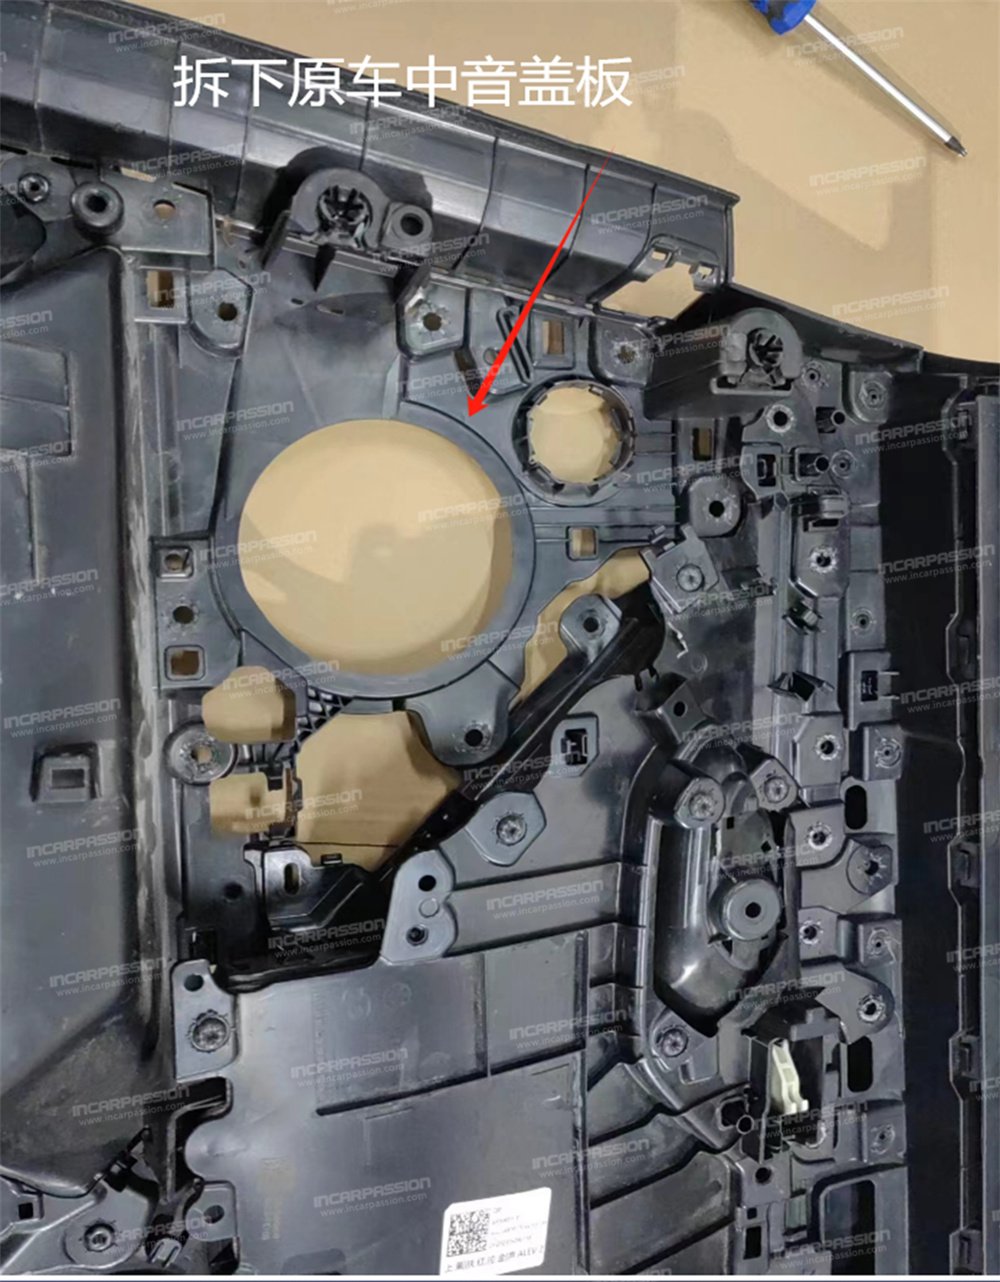
32. Remove the original car’s mid – range speaker cover.
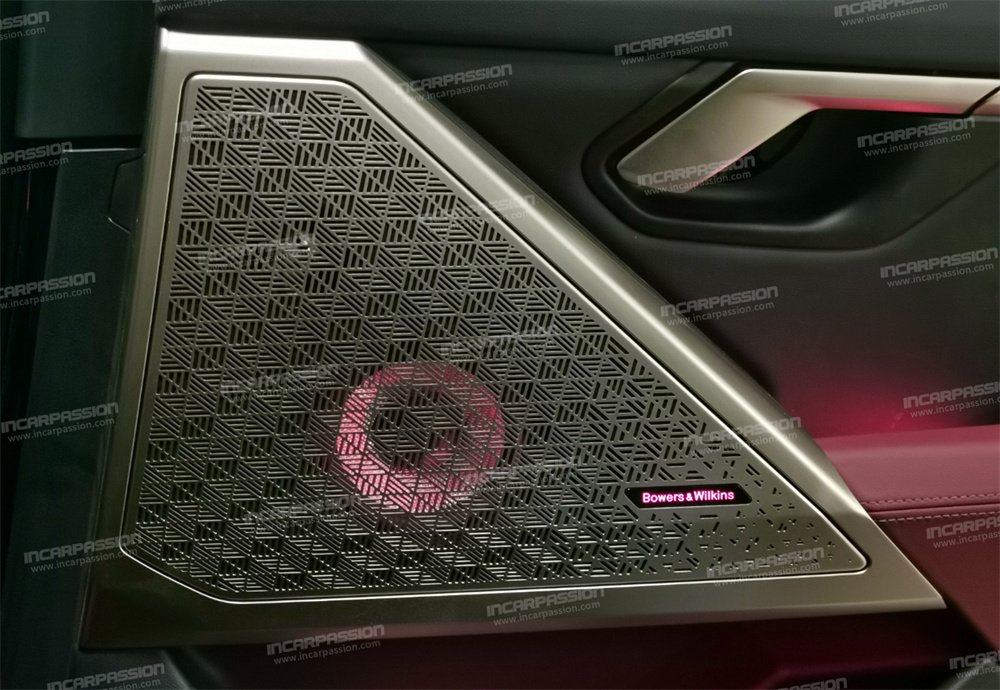
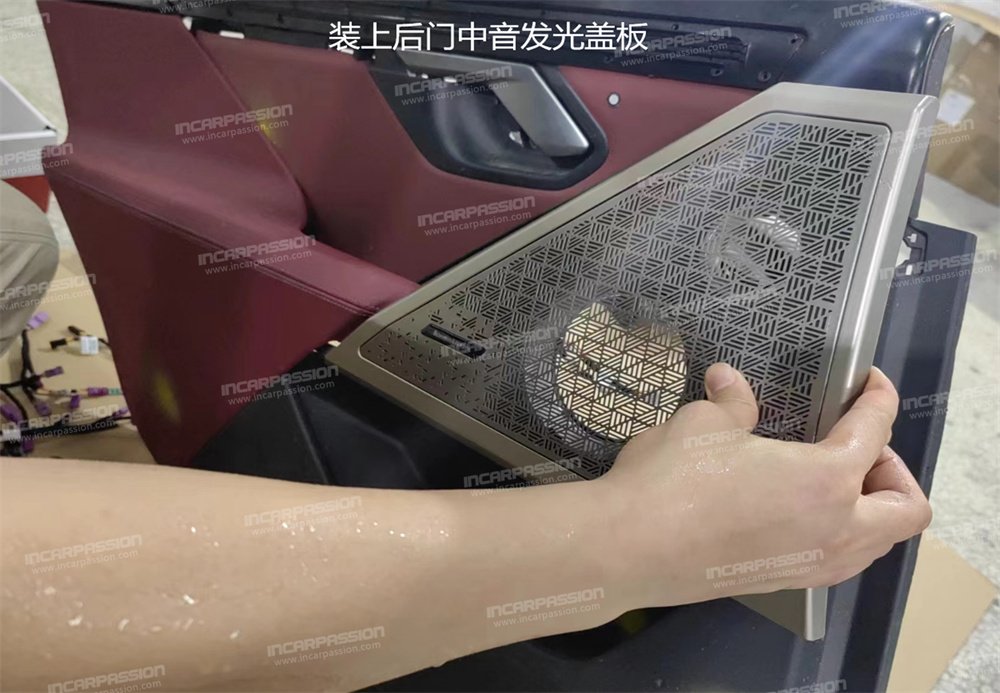
33. Install the luminous cover of the rear – door mid – range speaker.
34. Lock the screws.

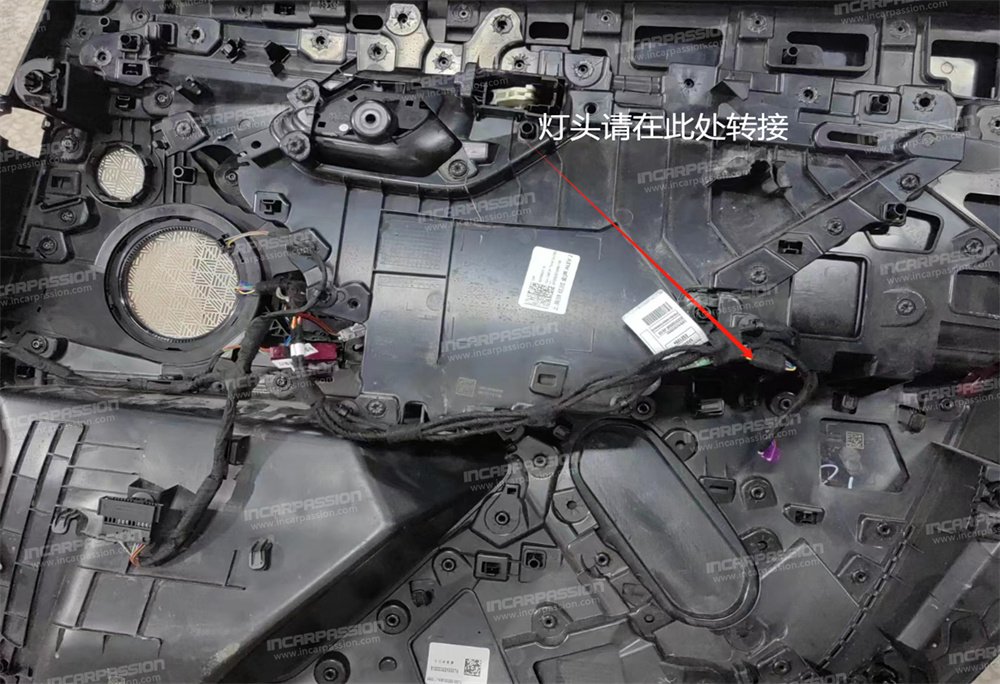
35. Please make a connection for the light – head here.
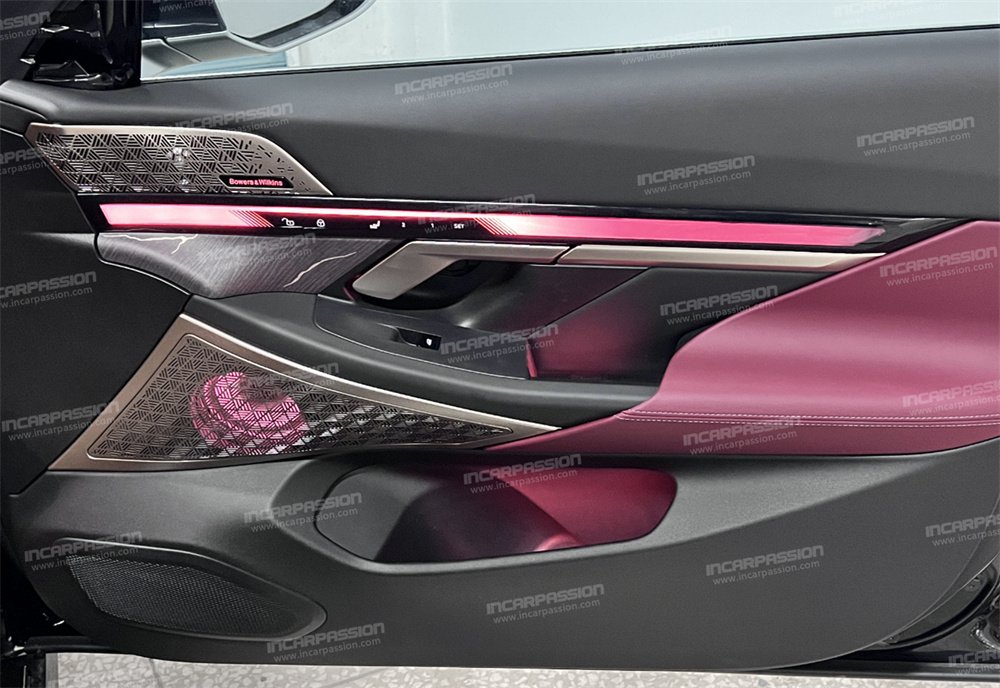
36. Install and restore.