Installation Instruction: How to install Audi A3 Ambient Light
This installation Instruction will show you how to install a Audi A3 Ambient Light to add multi-color ambient lights to the car.
Product link: Audi A3 32 Colors Ambient Light & LED Air Vent
Complete set include: dashboard ambient light x3, center console cup holder light x2, front & rear foot lamp x4, door light x4, handle light x4, storage box light x4
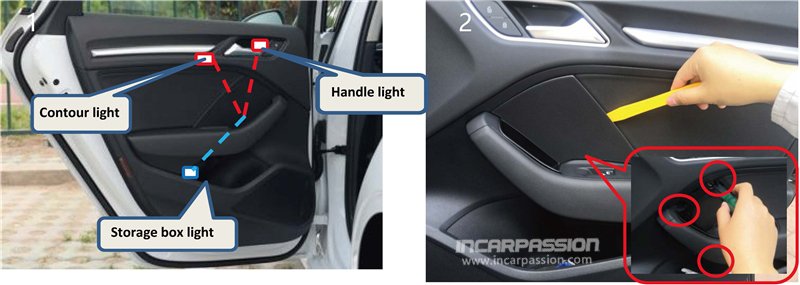
Door light installation
1, ①Contour light, handle light cable plug to control box port 1 ②cup holder light cable connect to control box port 2.
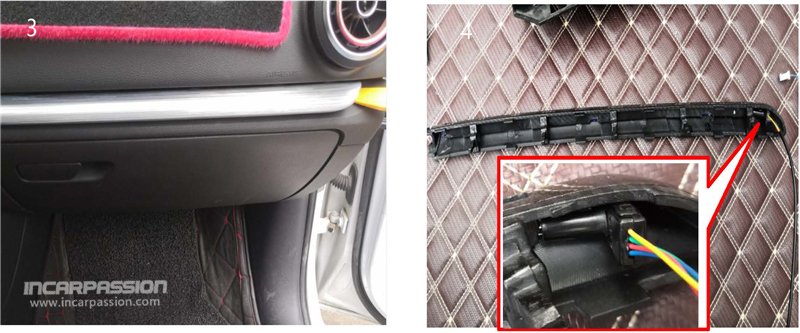
2, Pry out speaker cover, take out original 3pcs screws then remove door panel
3, Remove door trim and handle screws
4, Use 3mm screwdriver to drill a hole, install the handle light and fix it with glue
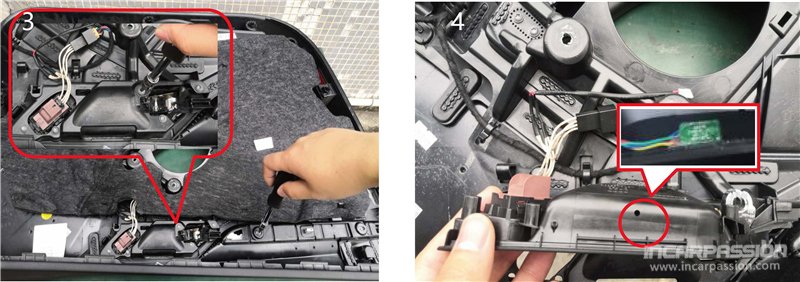
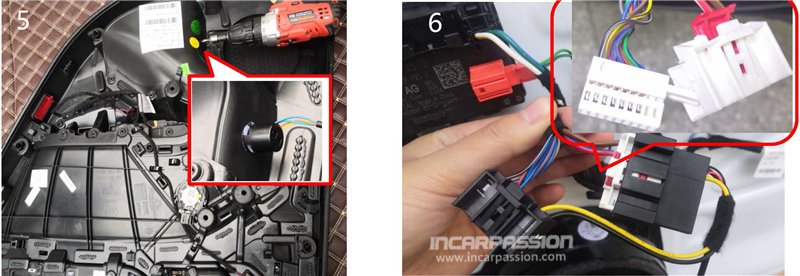
5,6: Use the produt bit to drill a hole at cup holder position and install the cup holder light Take out the door socket and convert to our power cable

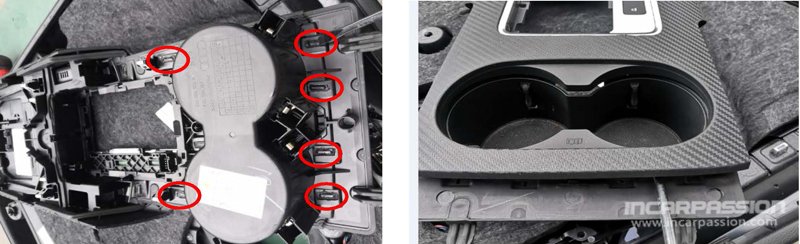
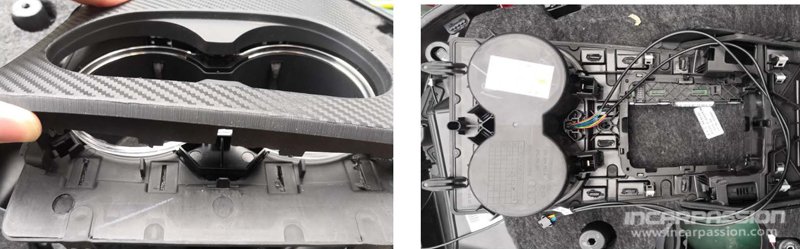
Cup holder installation
1, Pry out center console panel
2, Pry out the gear leather

3, Remove soldering point on cup holder
4, Pry up decoration part
5, Put the light part to cup holder position
6, Put cable in order
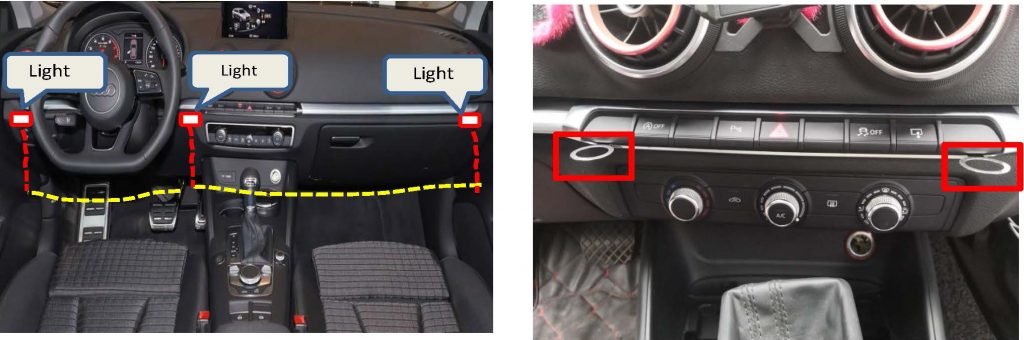
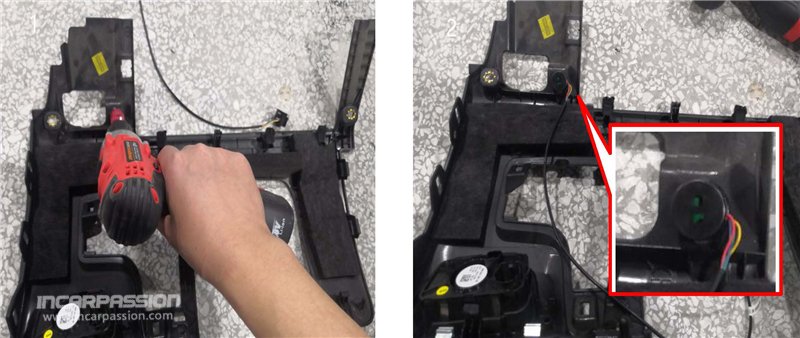
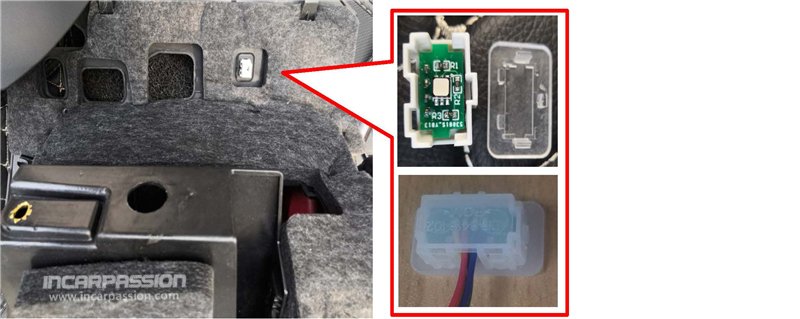
Dashboard light installation
1, Dashboard light position
2, Take out the button as picture show
3, Pry out decoration trim
4, Install the light to passenger seat dashboard trim
Front footlamp (round) Installation (Front footlampe have round and square 2 type, check which type you have before install)
Drill a hole to install the foot light
Front footlamp (square) Installation (Front footlampe have round and square 2 type, check which type you have before install)
Install our foot light to original foot light case
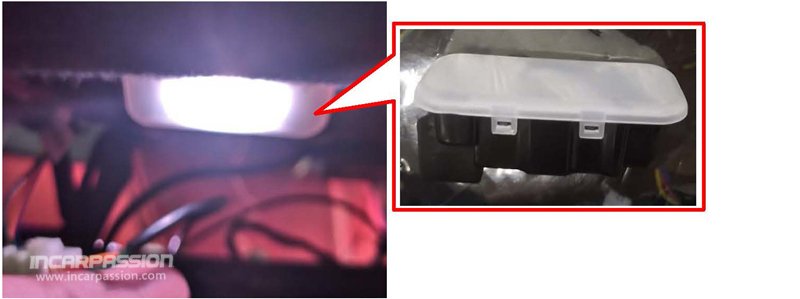
Rear footlight installation
Install the rear foot light to original position under seat
CAN cable connection
Remove glove box, take out the grey color 12PIN connector and convert to our CAN cable

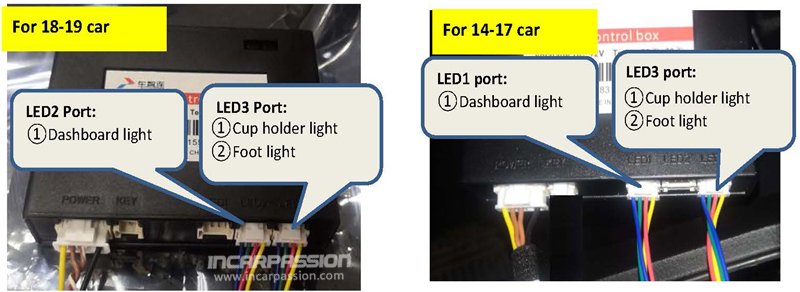
Control box definition
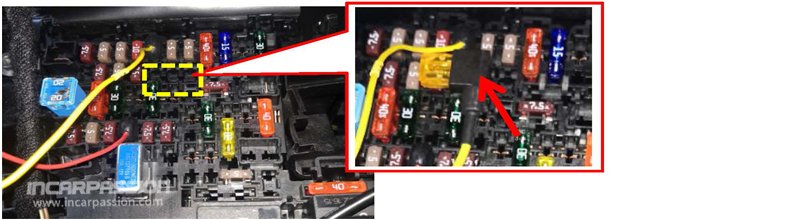
Power cable connection
Power cable fuse connect to fuse box BATT at driver side, GND cable connect to car body
Note: power cable must connect to BATT
Menu Operation
1, Enter “Vechile”
2, Enter “Vechile Setting”

3, Choose “Interior Lighting”
4, Enter “Interior Lighting” then can choose color (Breathing mode choose white color)

5, Choose “Interior Lighting” to choose color
6, Choose the last white color is breathing mode
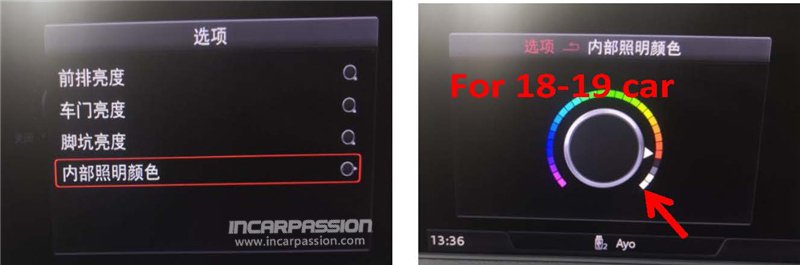
“Breathing Mode”:choose last white color, wait 40 seconds then it will change color automatically